
Basic CI/CD pipeline with Github Actions and AWS EC2
Published At: 01/11/2023
In the following tutorial we'll create a CI/CD pipeline using Github Actions and automate the process of redeploying a NodeJS app on AWS'S EC2 instance using pm2 when a change is made in our app's Github repository.
Prerequisite:
- Basic knowledge of the Terminal and Bash commands
- Git installed on your local machine
- A Github account
- NodeJS installed (i'll be using v18.17.1) and basic knowledge of NodeJS
- An AWS account
Steps:
- Develop a basic NodeJS application
- Connect the NodeJS application to a Github repository
- Launch an EC2 instance
- Run the NodeJS application on the EC2 instance using pm2
- Create a Github Actions workflow
1. Develop a basic NodeJS application:
The first thing we'll do is to develop a basic NodeJS app as an example of a real life app.
Firstly, we'll navigate, using the terminal to the location we want to store the application:
cd /PATH/TO/YOUR/APP
Here we'll initialize an package.json using the following command:
npm init -y
Now, create an index.js file to serve as the main entry point for your NodeJS:
touch index.js
Write a simple console.log("Hello World!") inside the index.js.
To check if the application in running correctly, head back to the terminal and run:
    node index.js

//Expected result: Hello World!
Great, we have our basic NodeJS running.
2. Connect the NodeJS application to a Github repository:
In this step we'll upload our code and manage it in an online source control platform. For this tutorial we'll use Github.
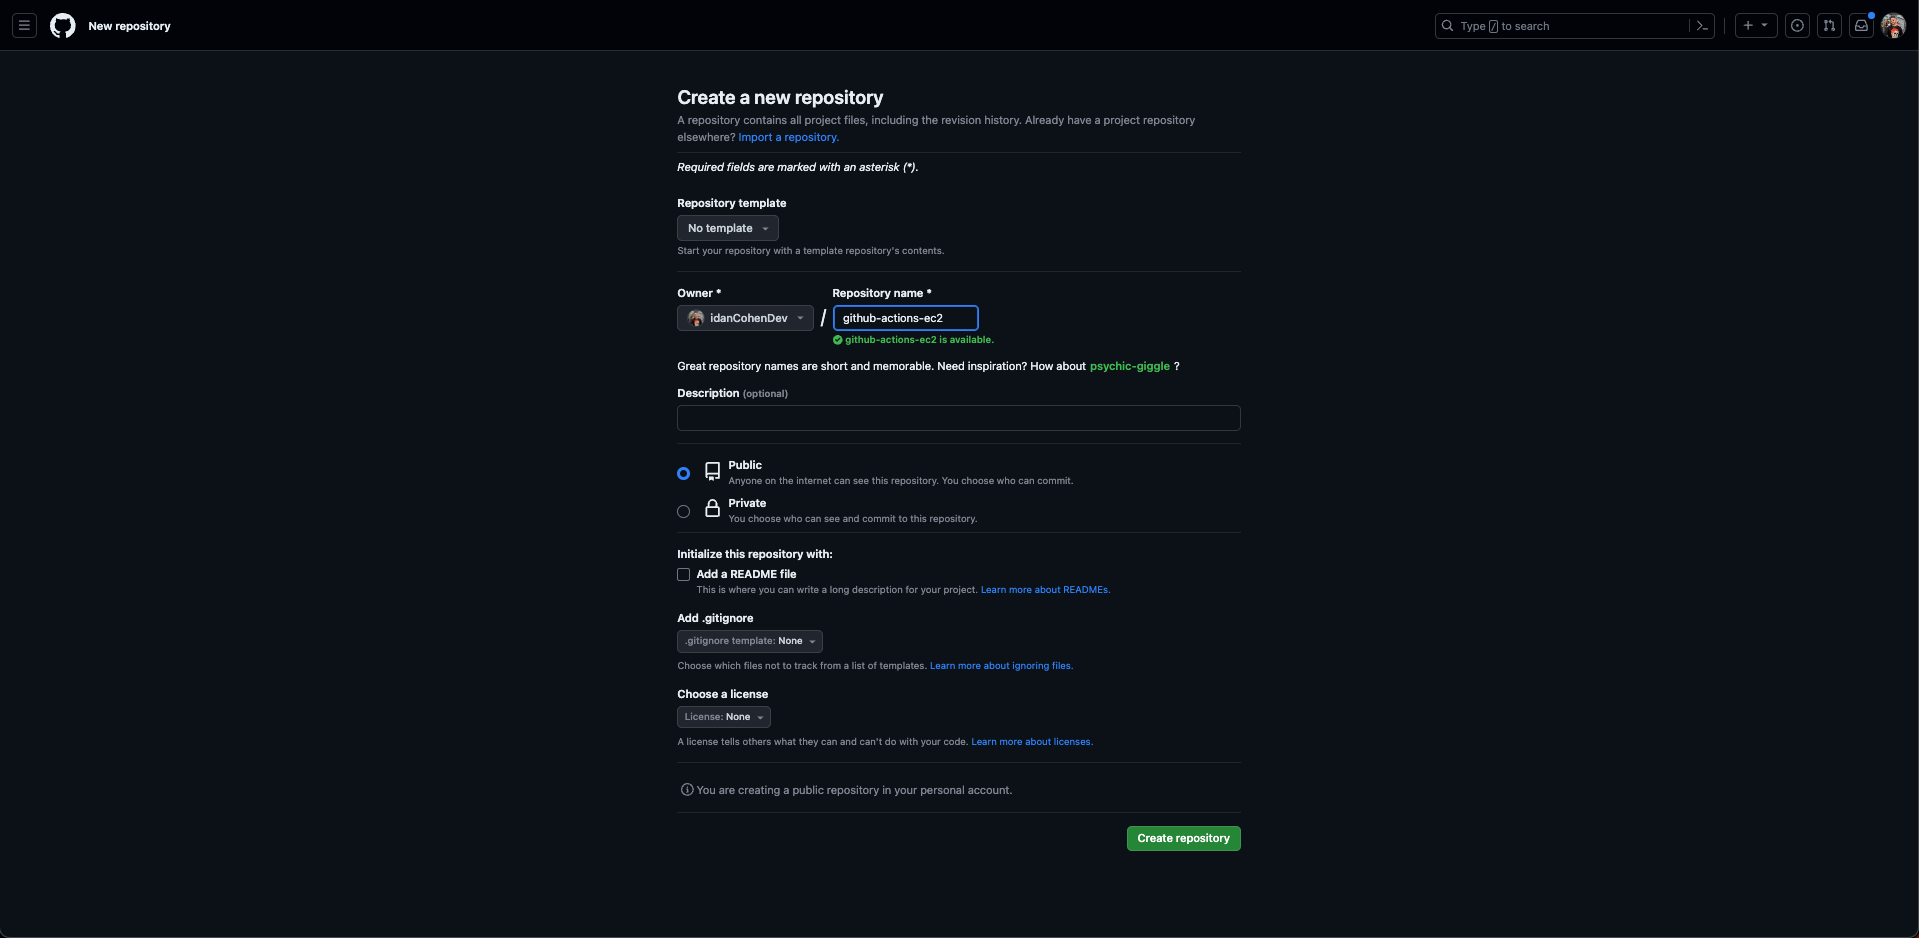
Log in or sign up to your Github account, and in the main page click on the New button to create a new repository:

Give your repository a name and configure it as you like.
After that press the Create Repository button:
In your terminal navigate to the root of your NodeJS project and run the following commands:
    git init
git remote add origin https://github.com/YOUR_GITHUB_USERNAME/THE_NAME_OF_YOUR_REPOSITORY.git
git branch -M master
git add .
git commit -m "initial"
git push -u origin master
Refresh the repository page on Github and you should see the code of your NodeJS application:
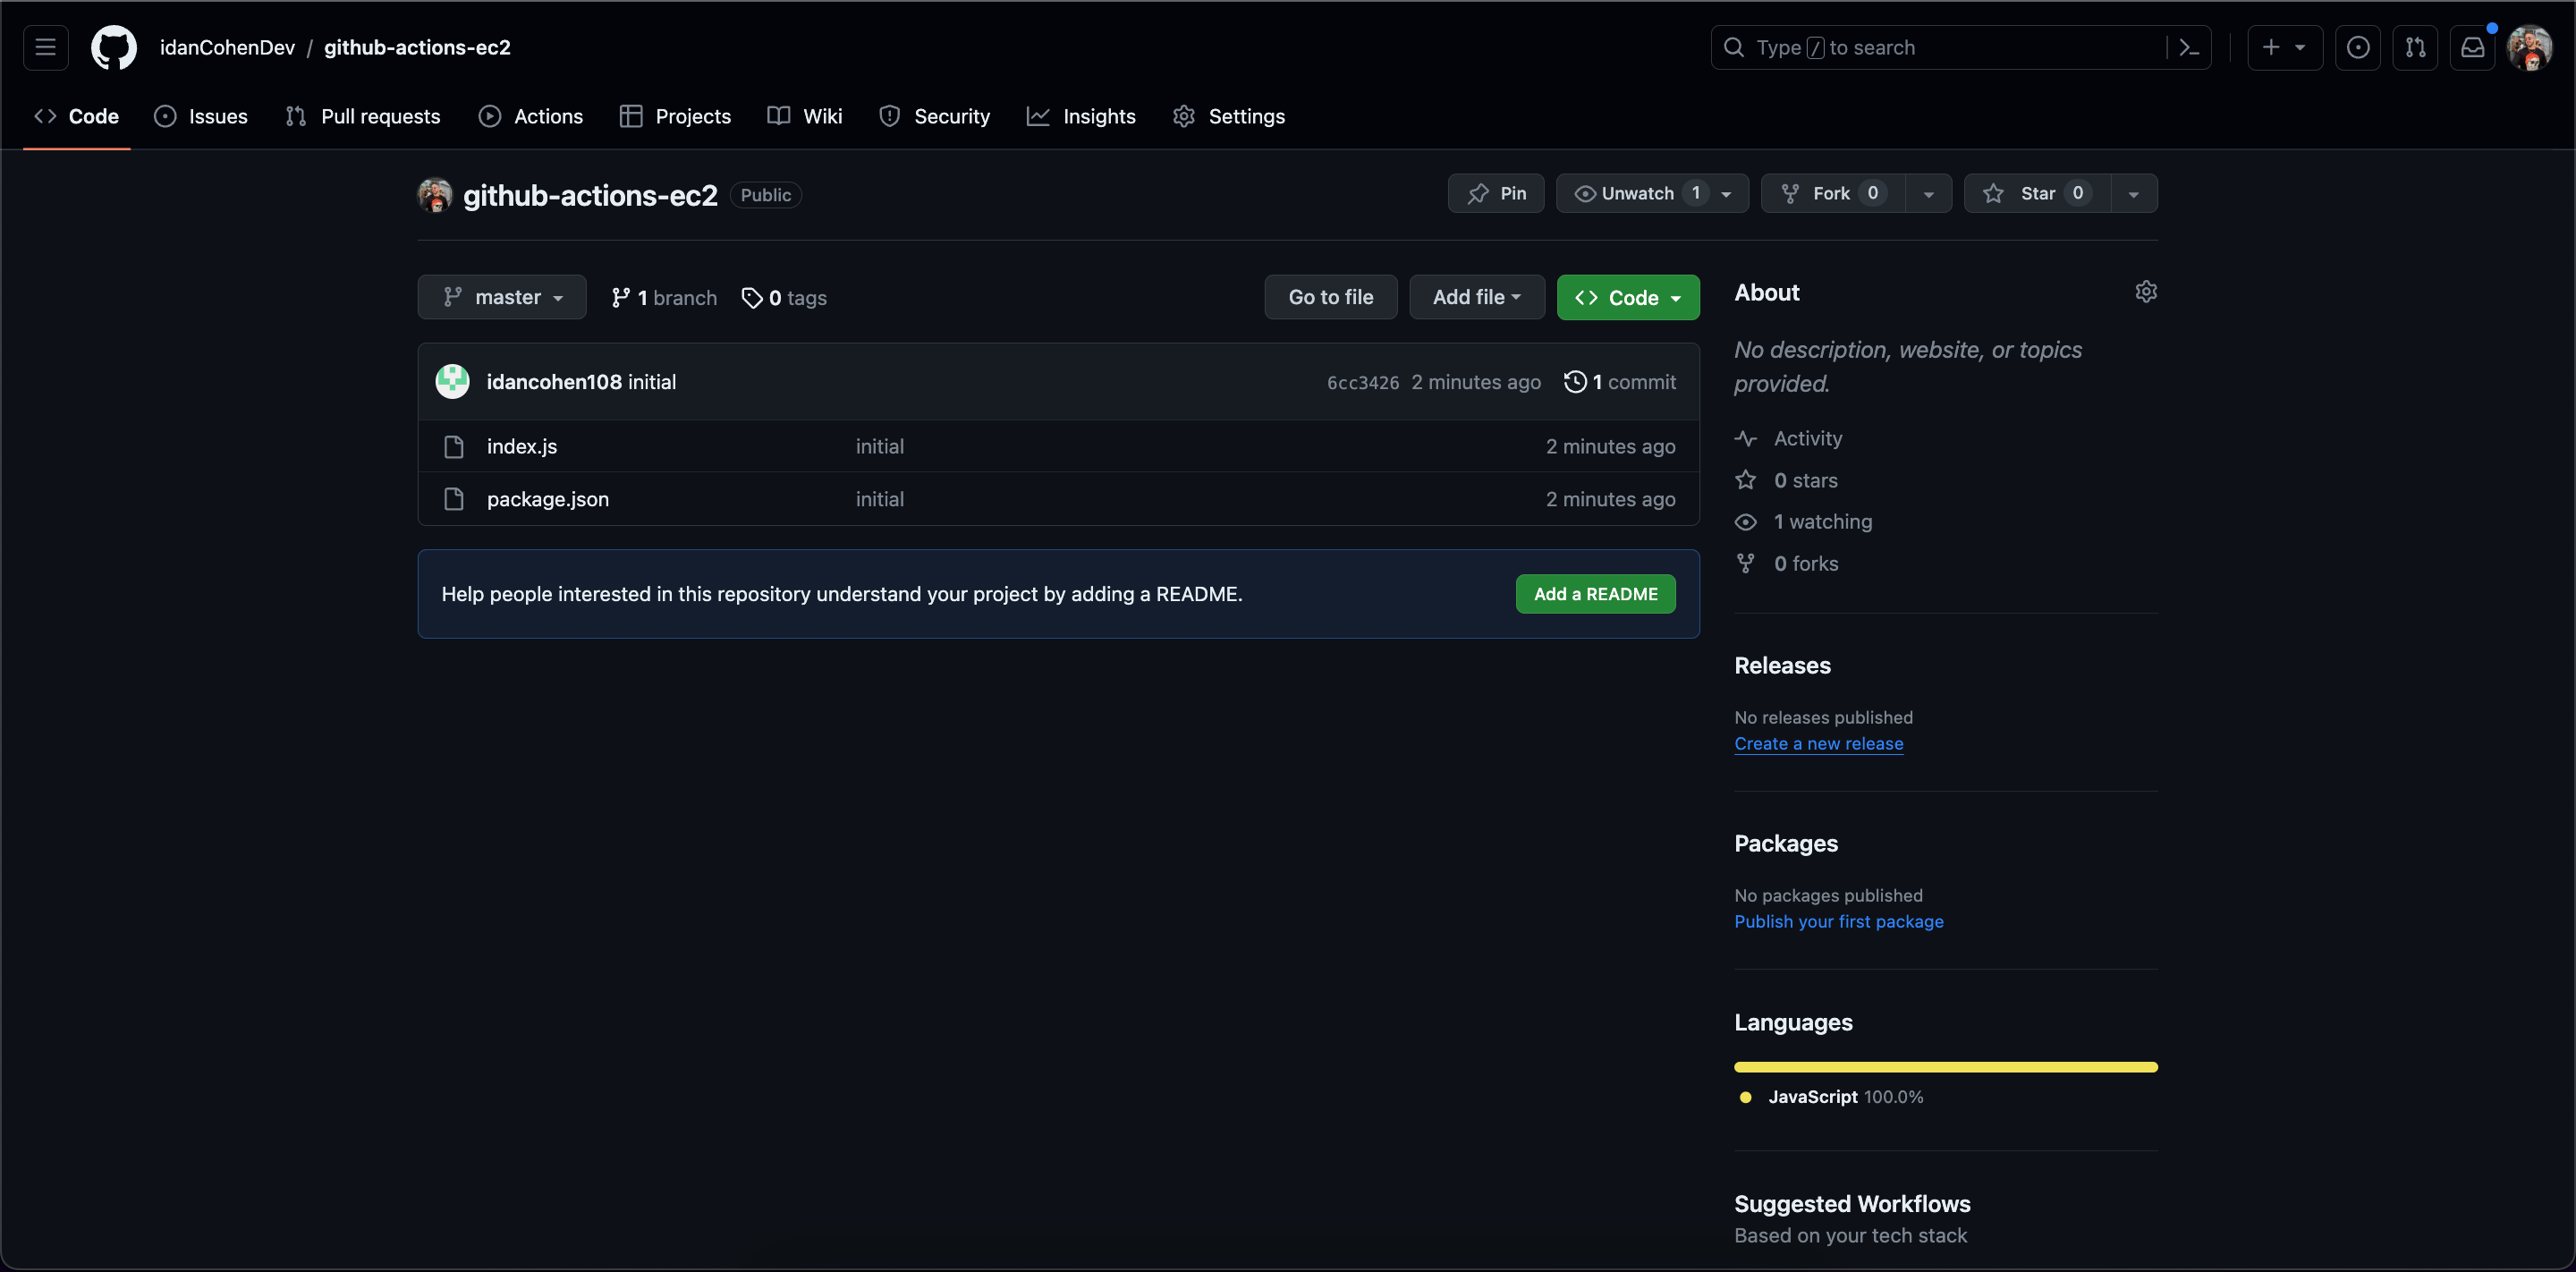
Excellent! Our code is managed inside a Github repository. This will enable us to create workflows for that code base and listen to events such as merge, push, commit, etc.
3. Launch an EC2 instance:
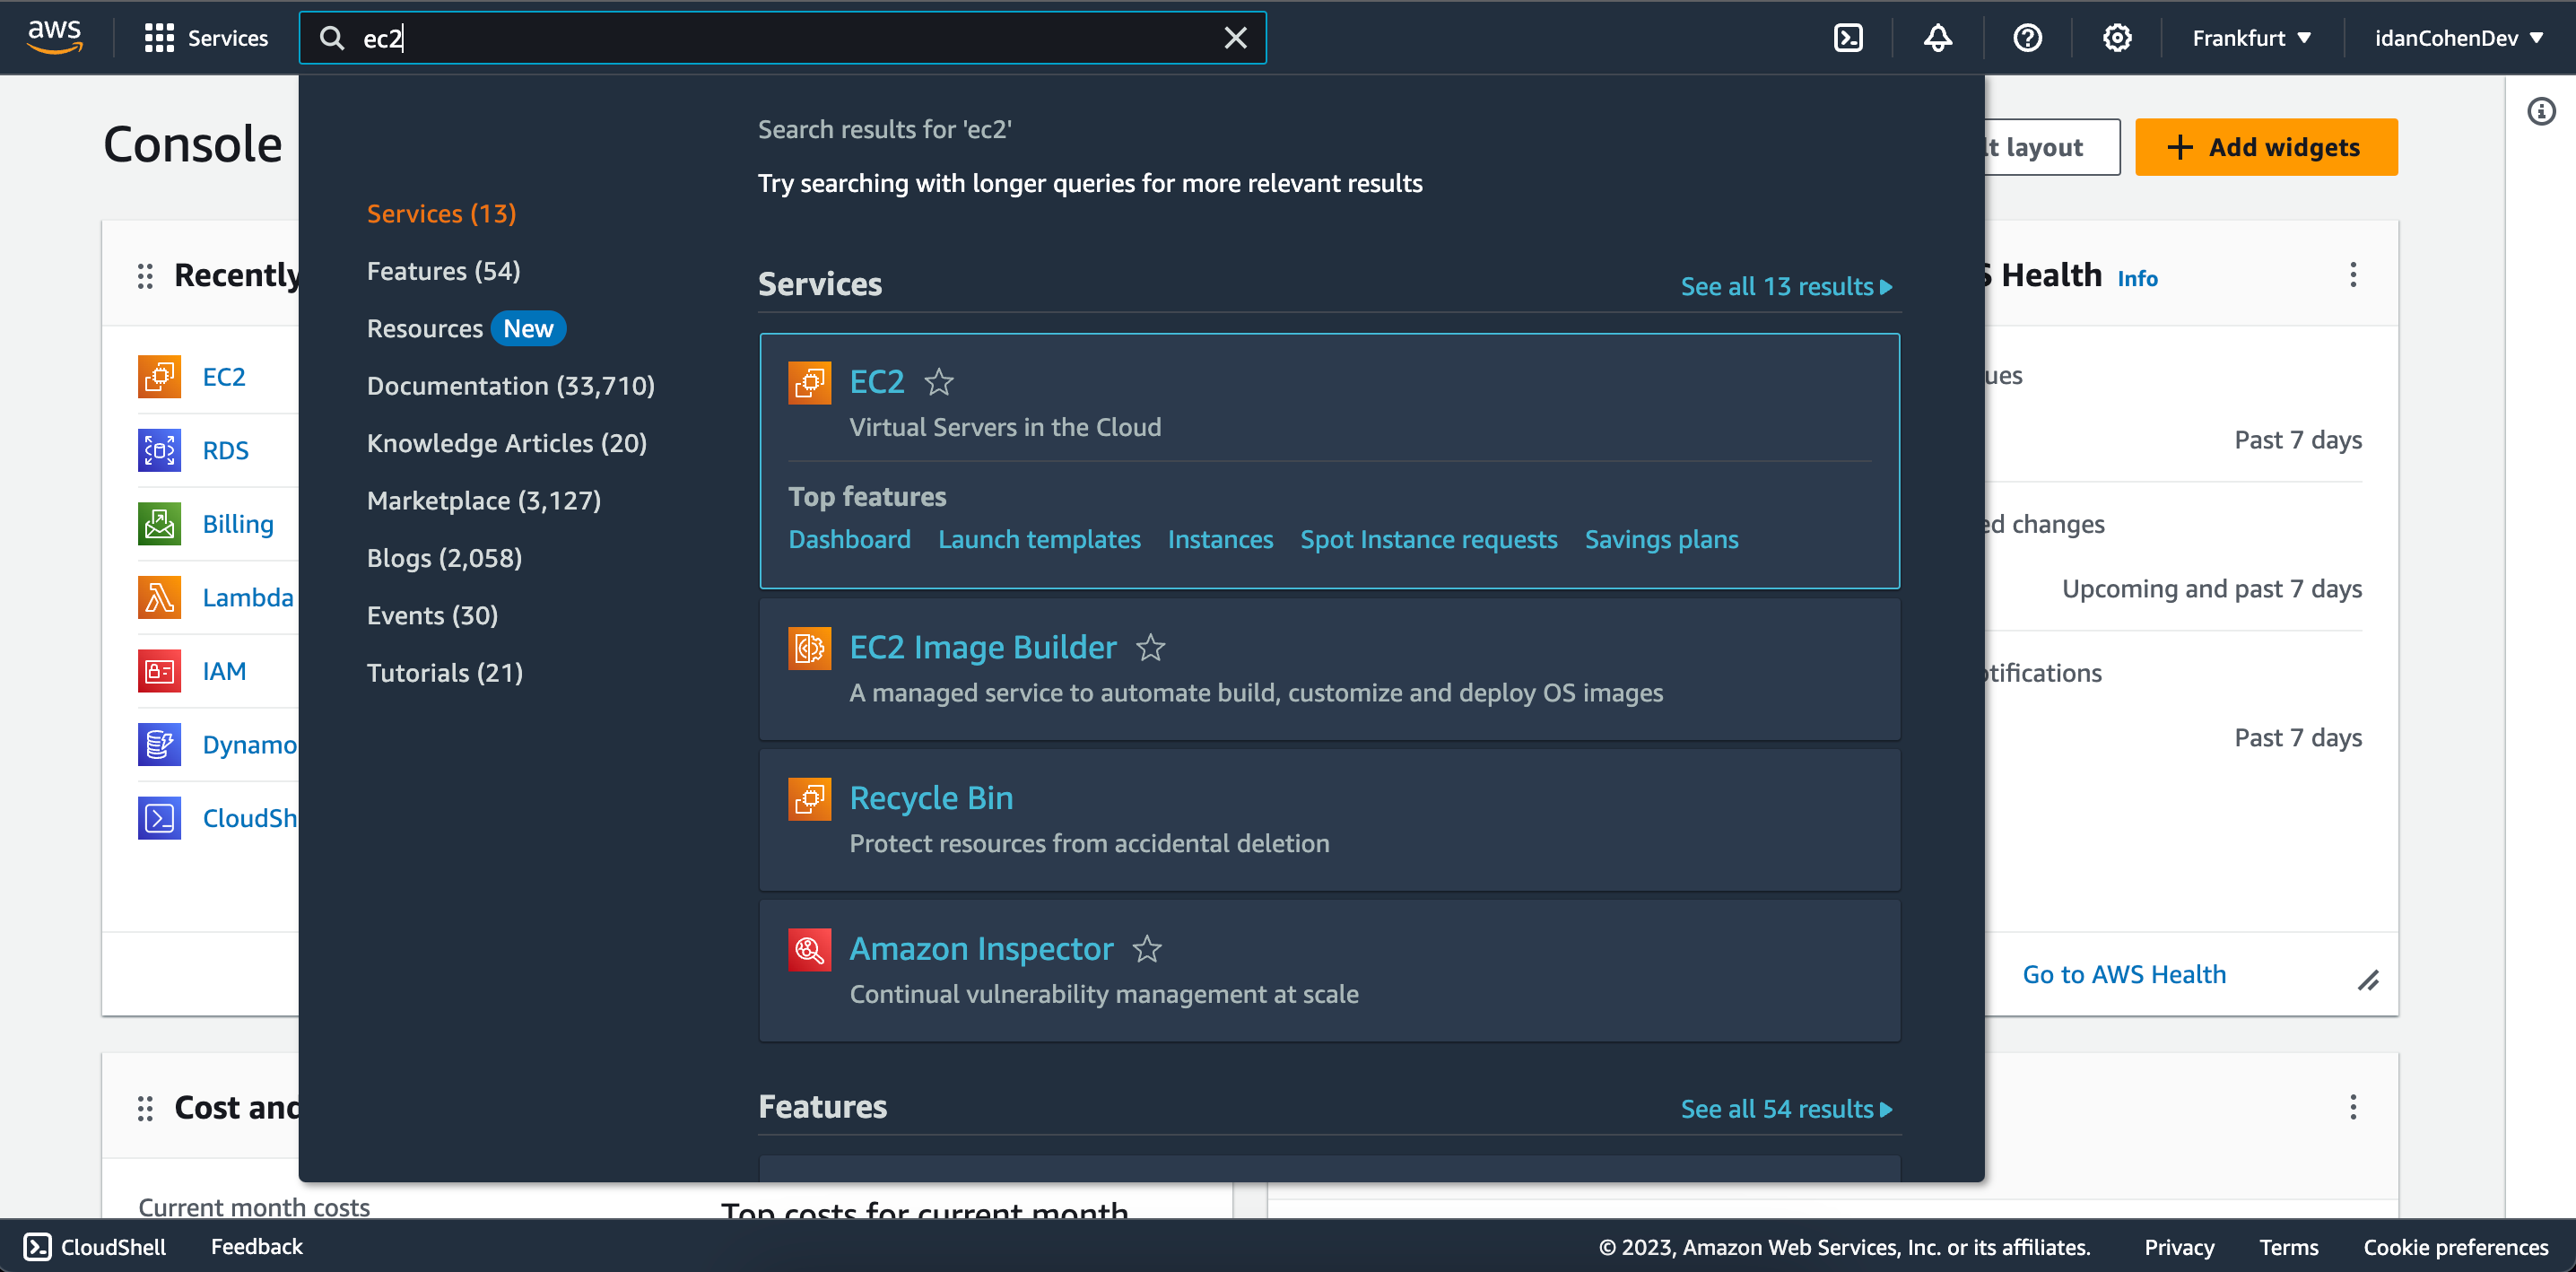
Log in or sign up to AWS console, type ec2 in the search bar at the top of the screen and click on the EC2 result:
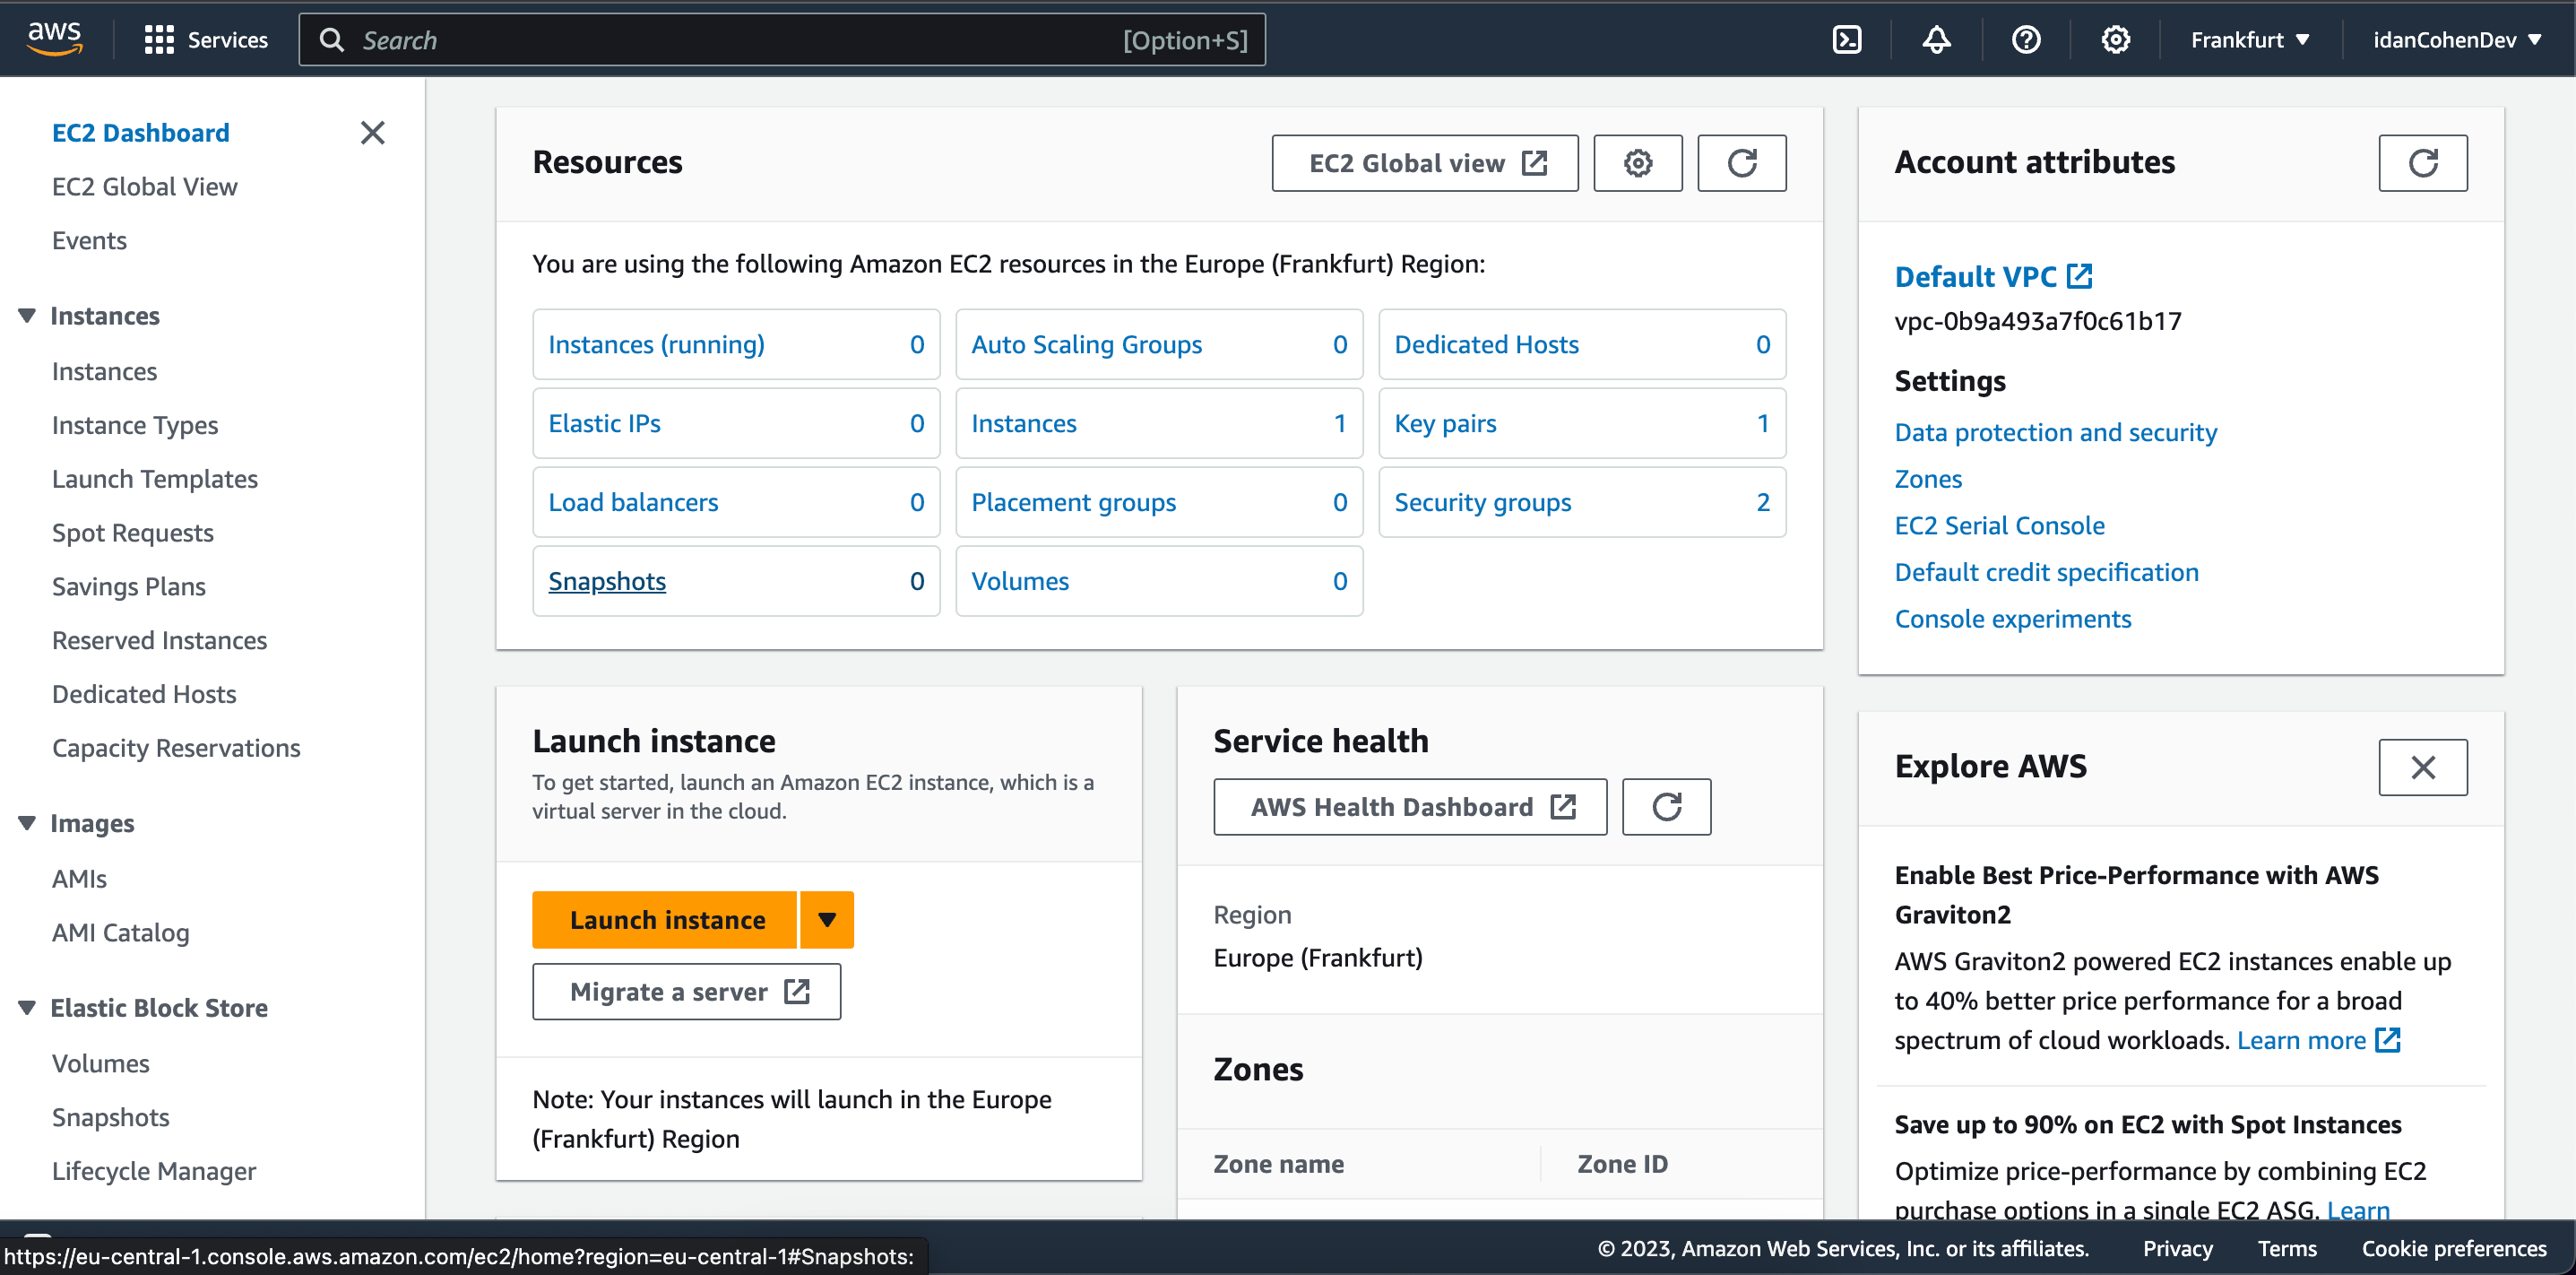
Here press on the orange Launch instance button:
In the Launch an instance page you can configure your EC2 instance however you like (for more information click here) but for this tutorial
we'll only change the Application and OS Images to Ubuntu and leave everything else as the default:
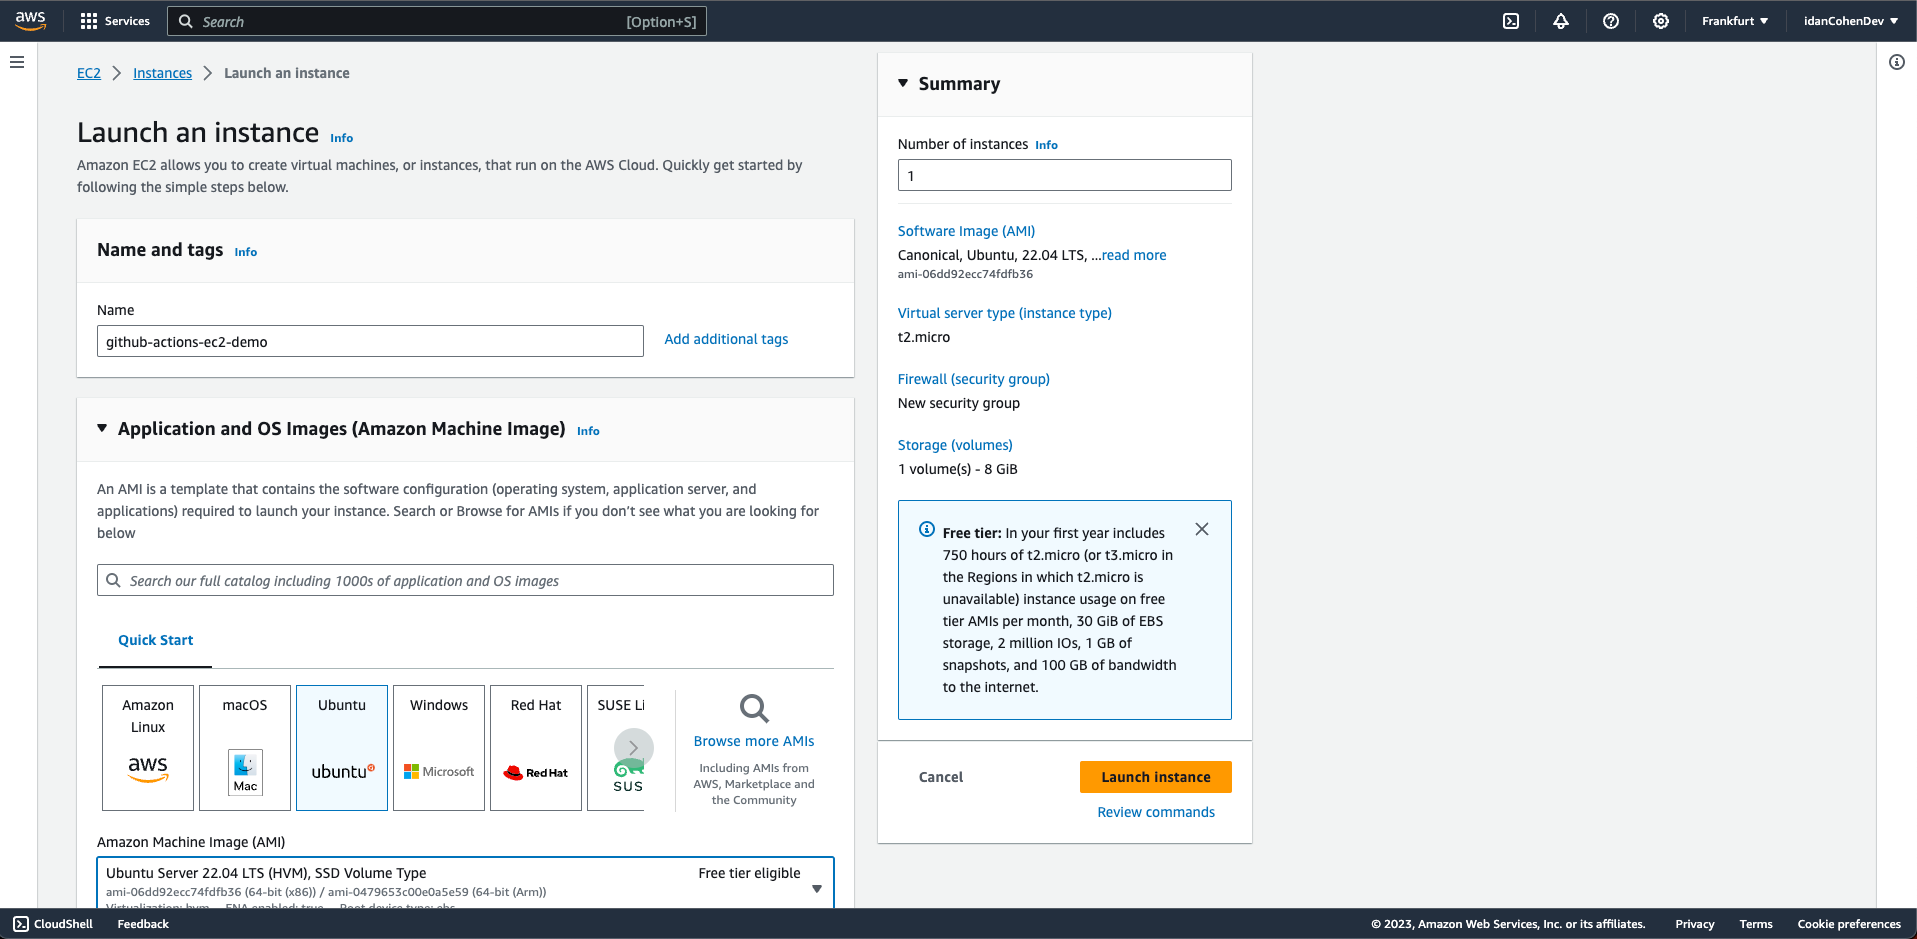
Scroll down in the Launch an instance page to the Key pair (login) section and click on the Create new key pair link:

In the window that opened upon pressing the link, give the Key pair a name in the Key pair name input and click on the orange Create key pair button:
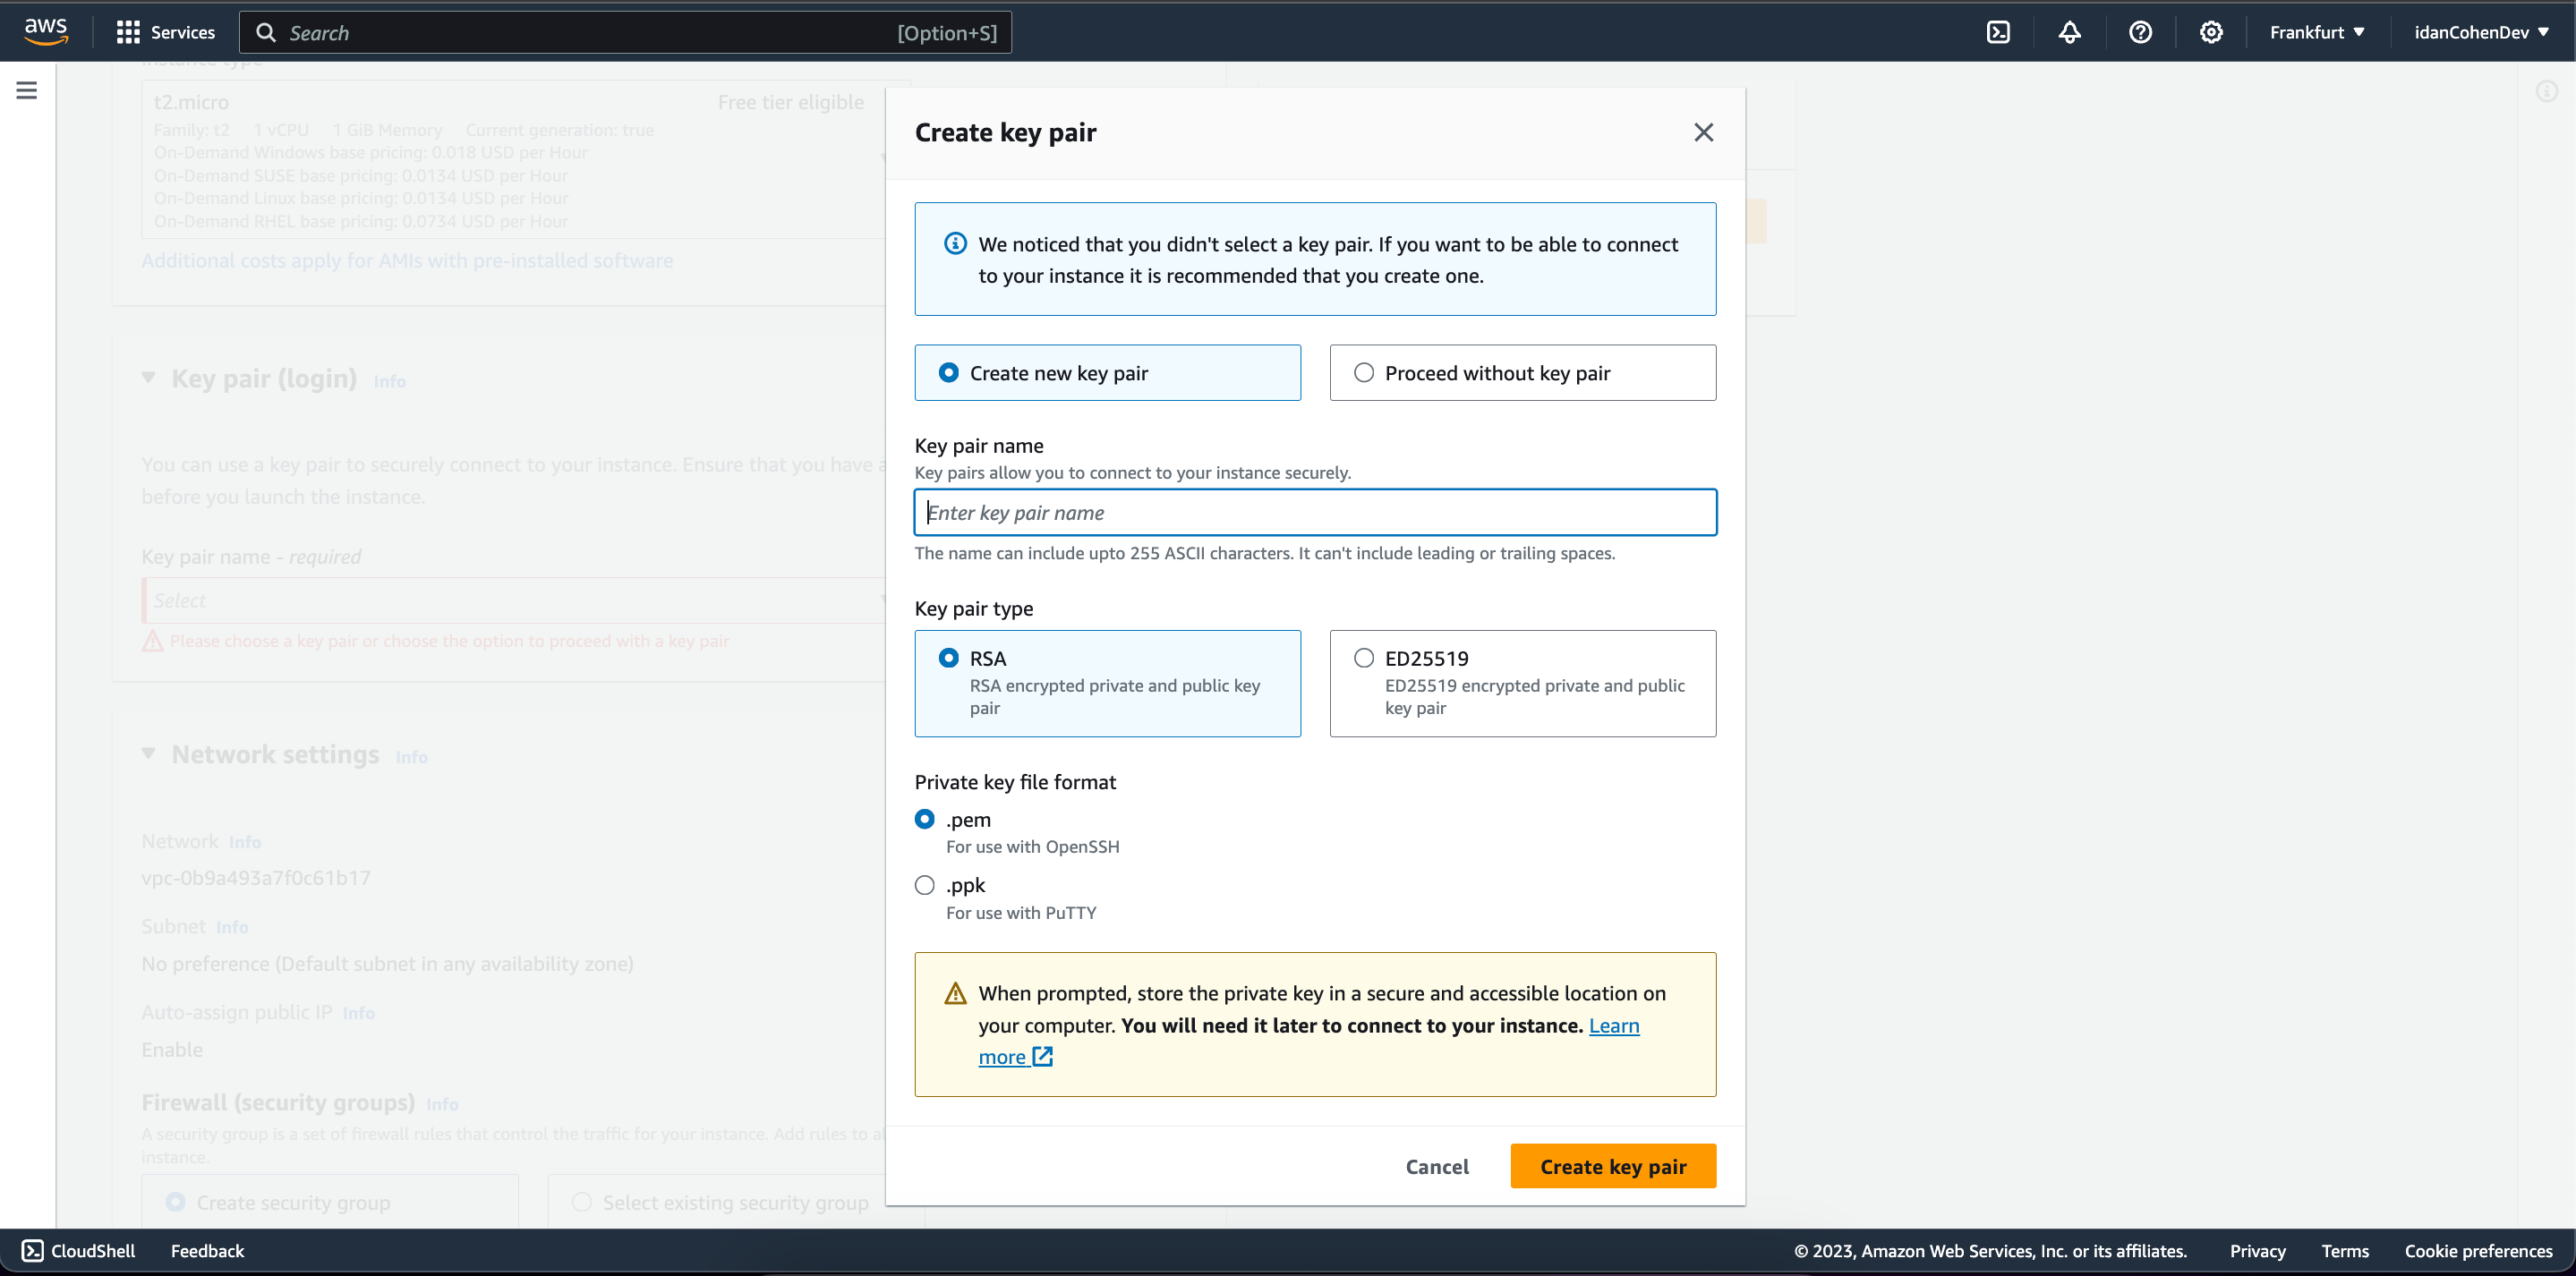
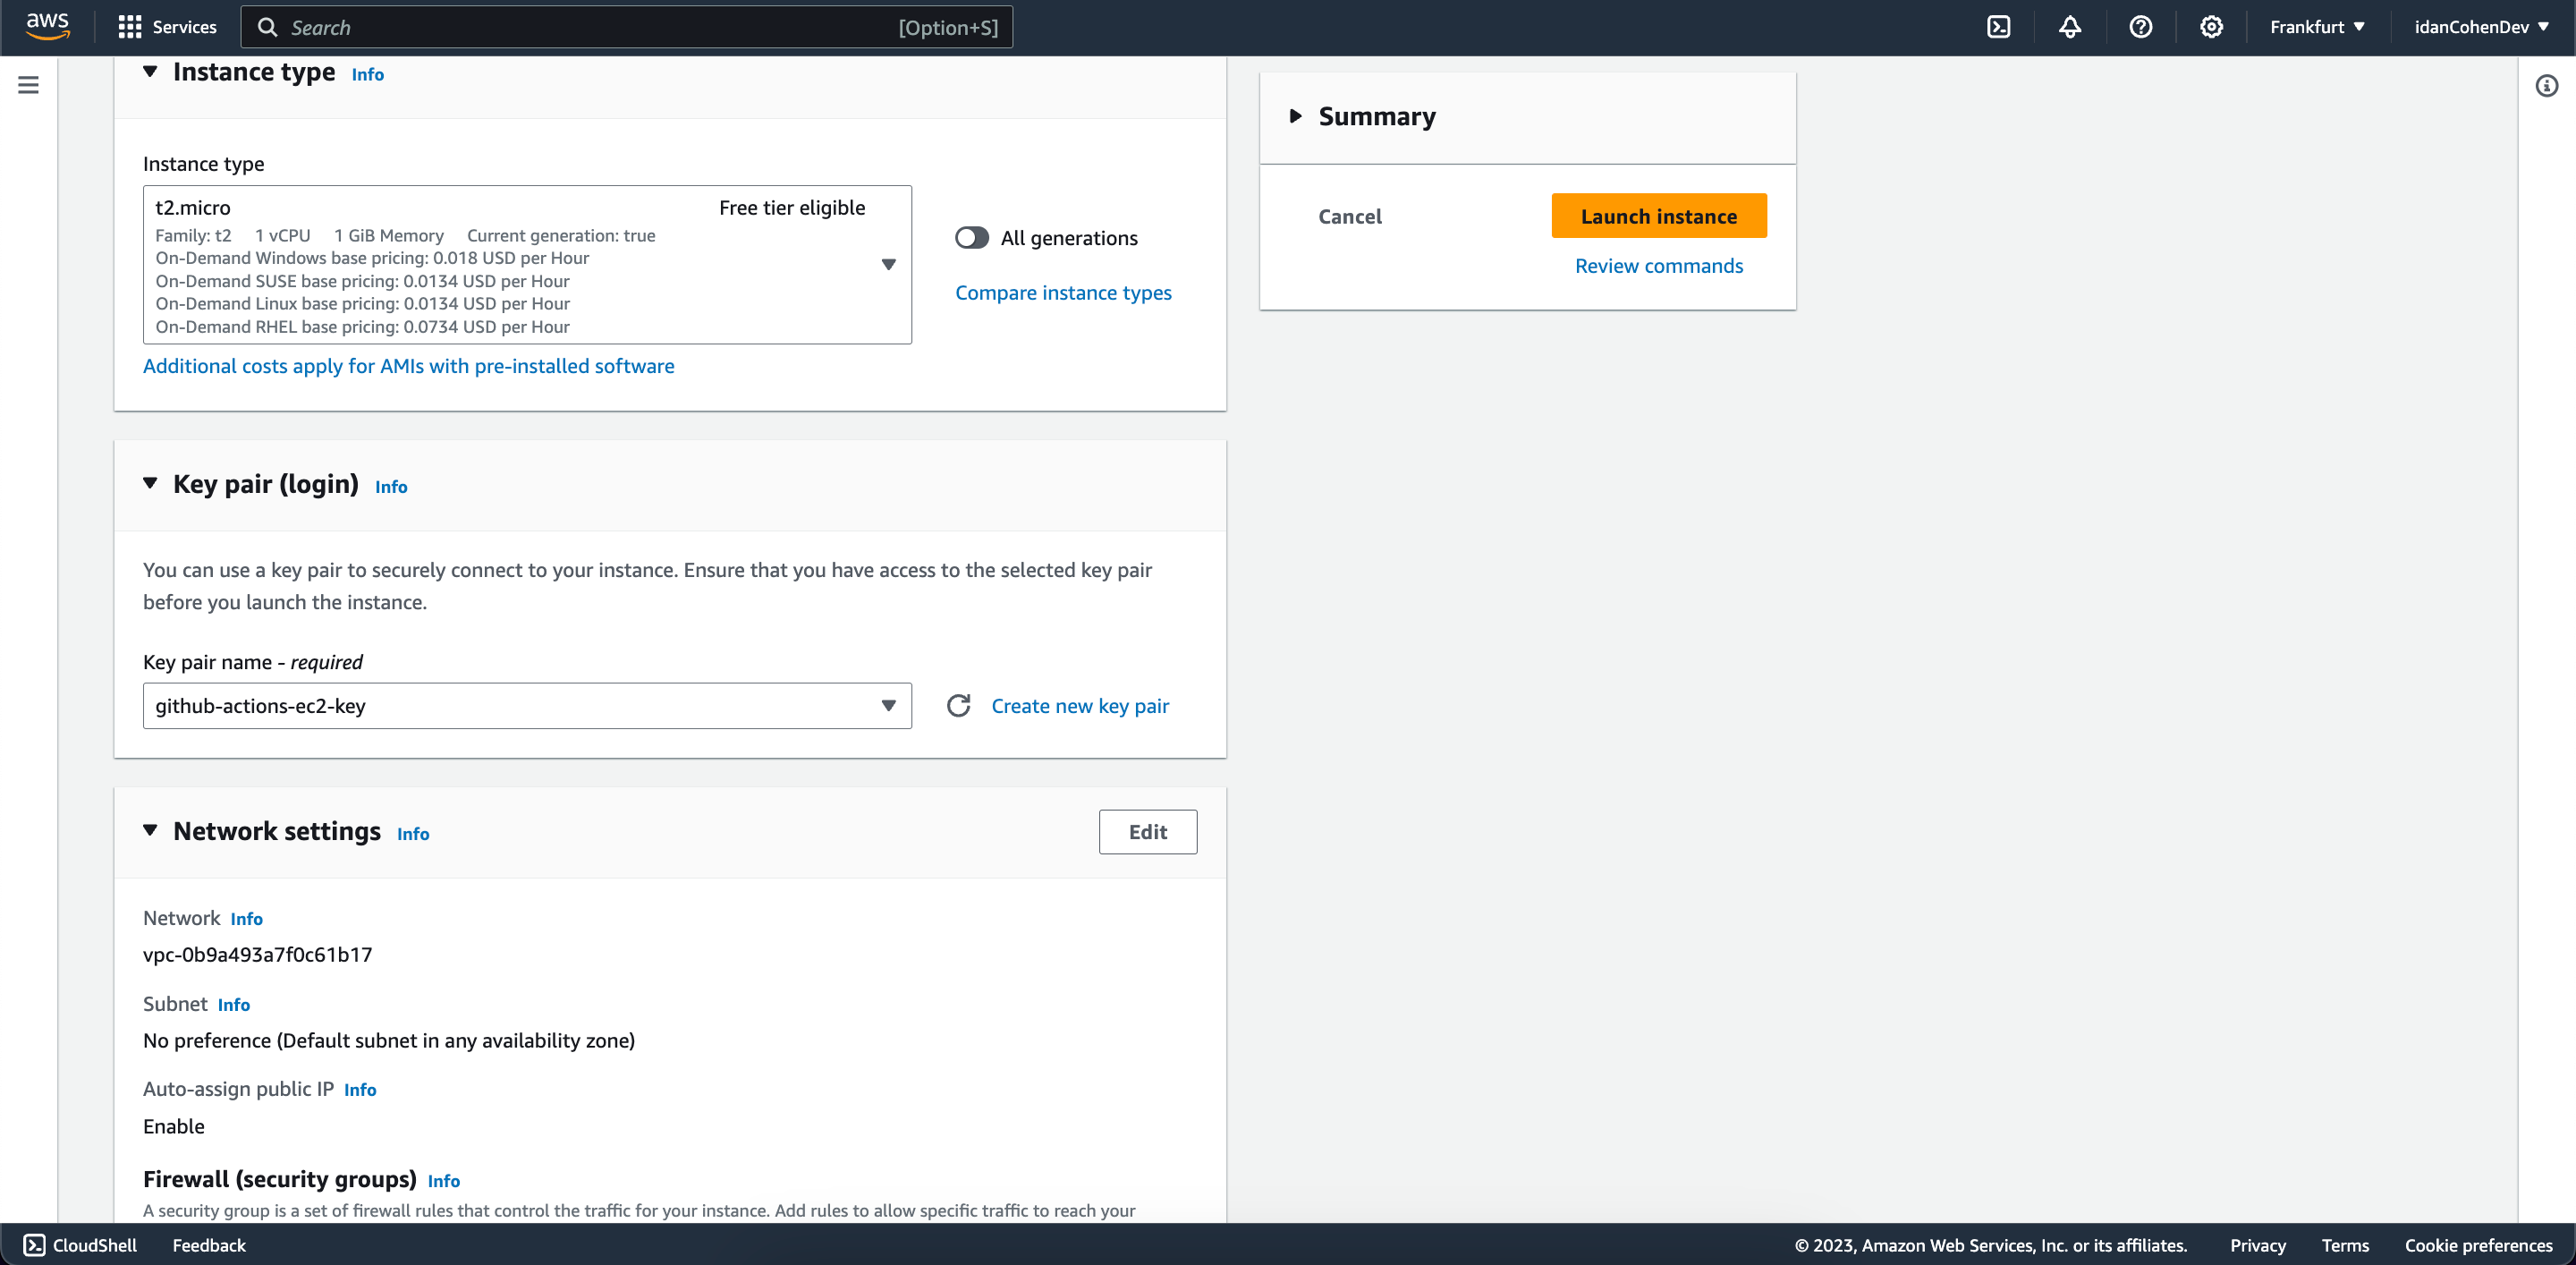
Save the key downloaded in a secure location because that what we'll use in order to connect to our remote server.
Great now that we've configured our EC2 instance we can press the orange Launch instance button:
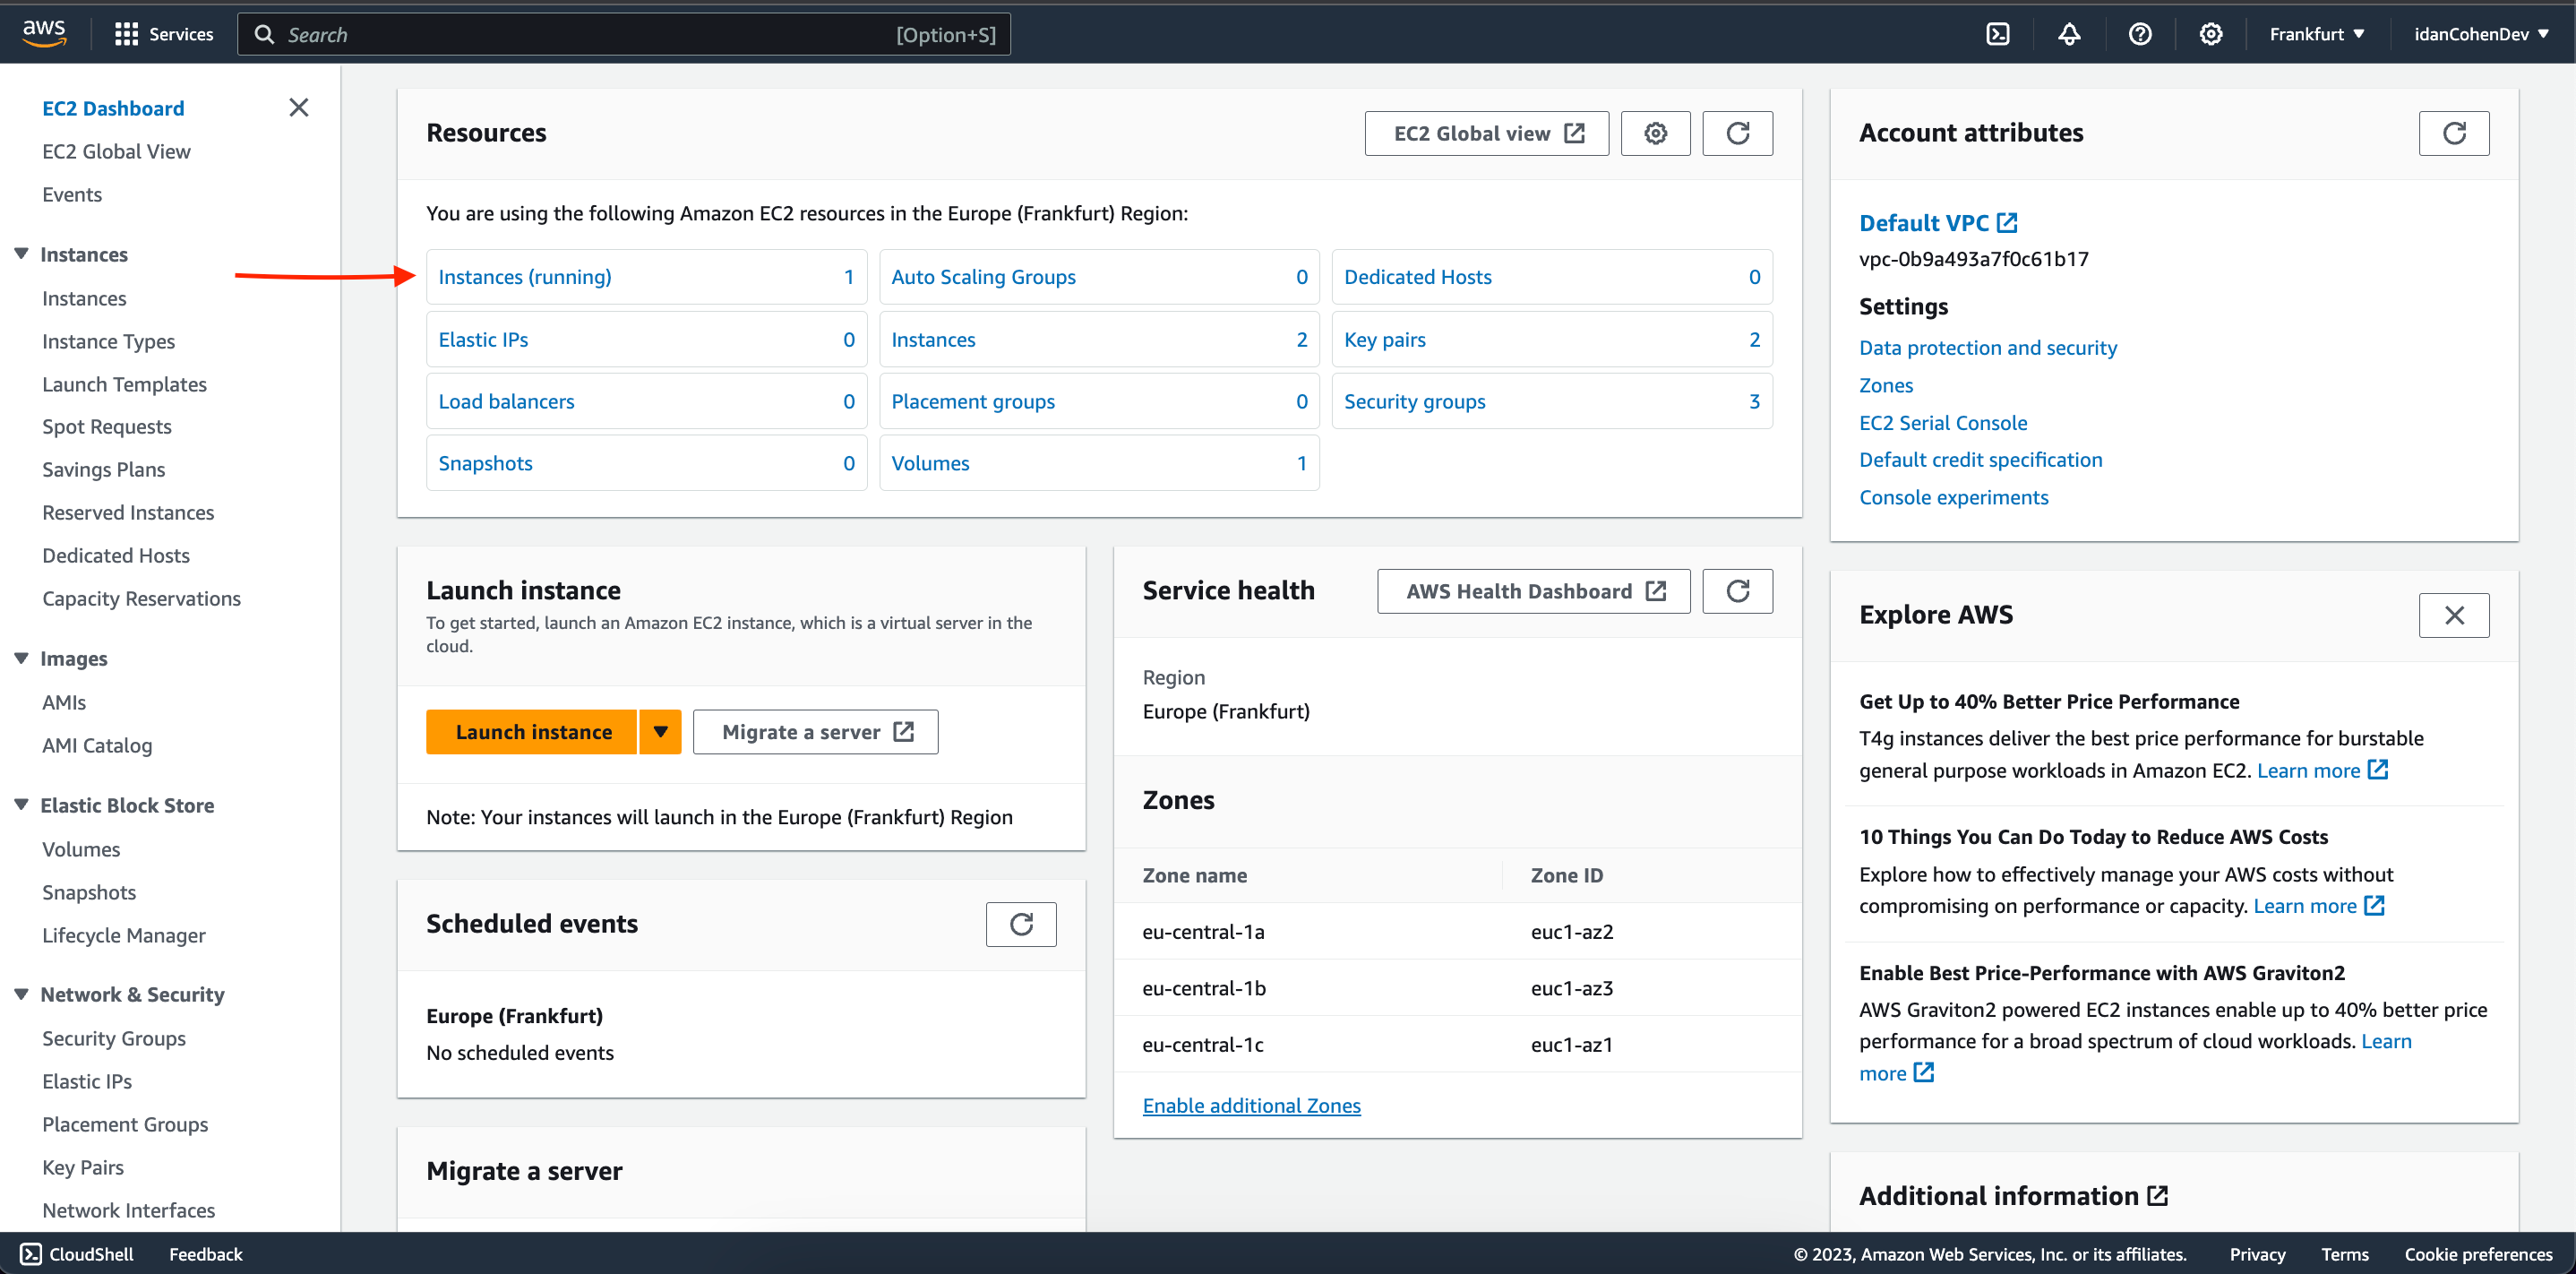
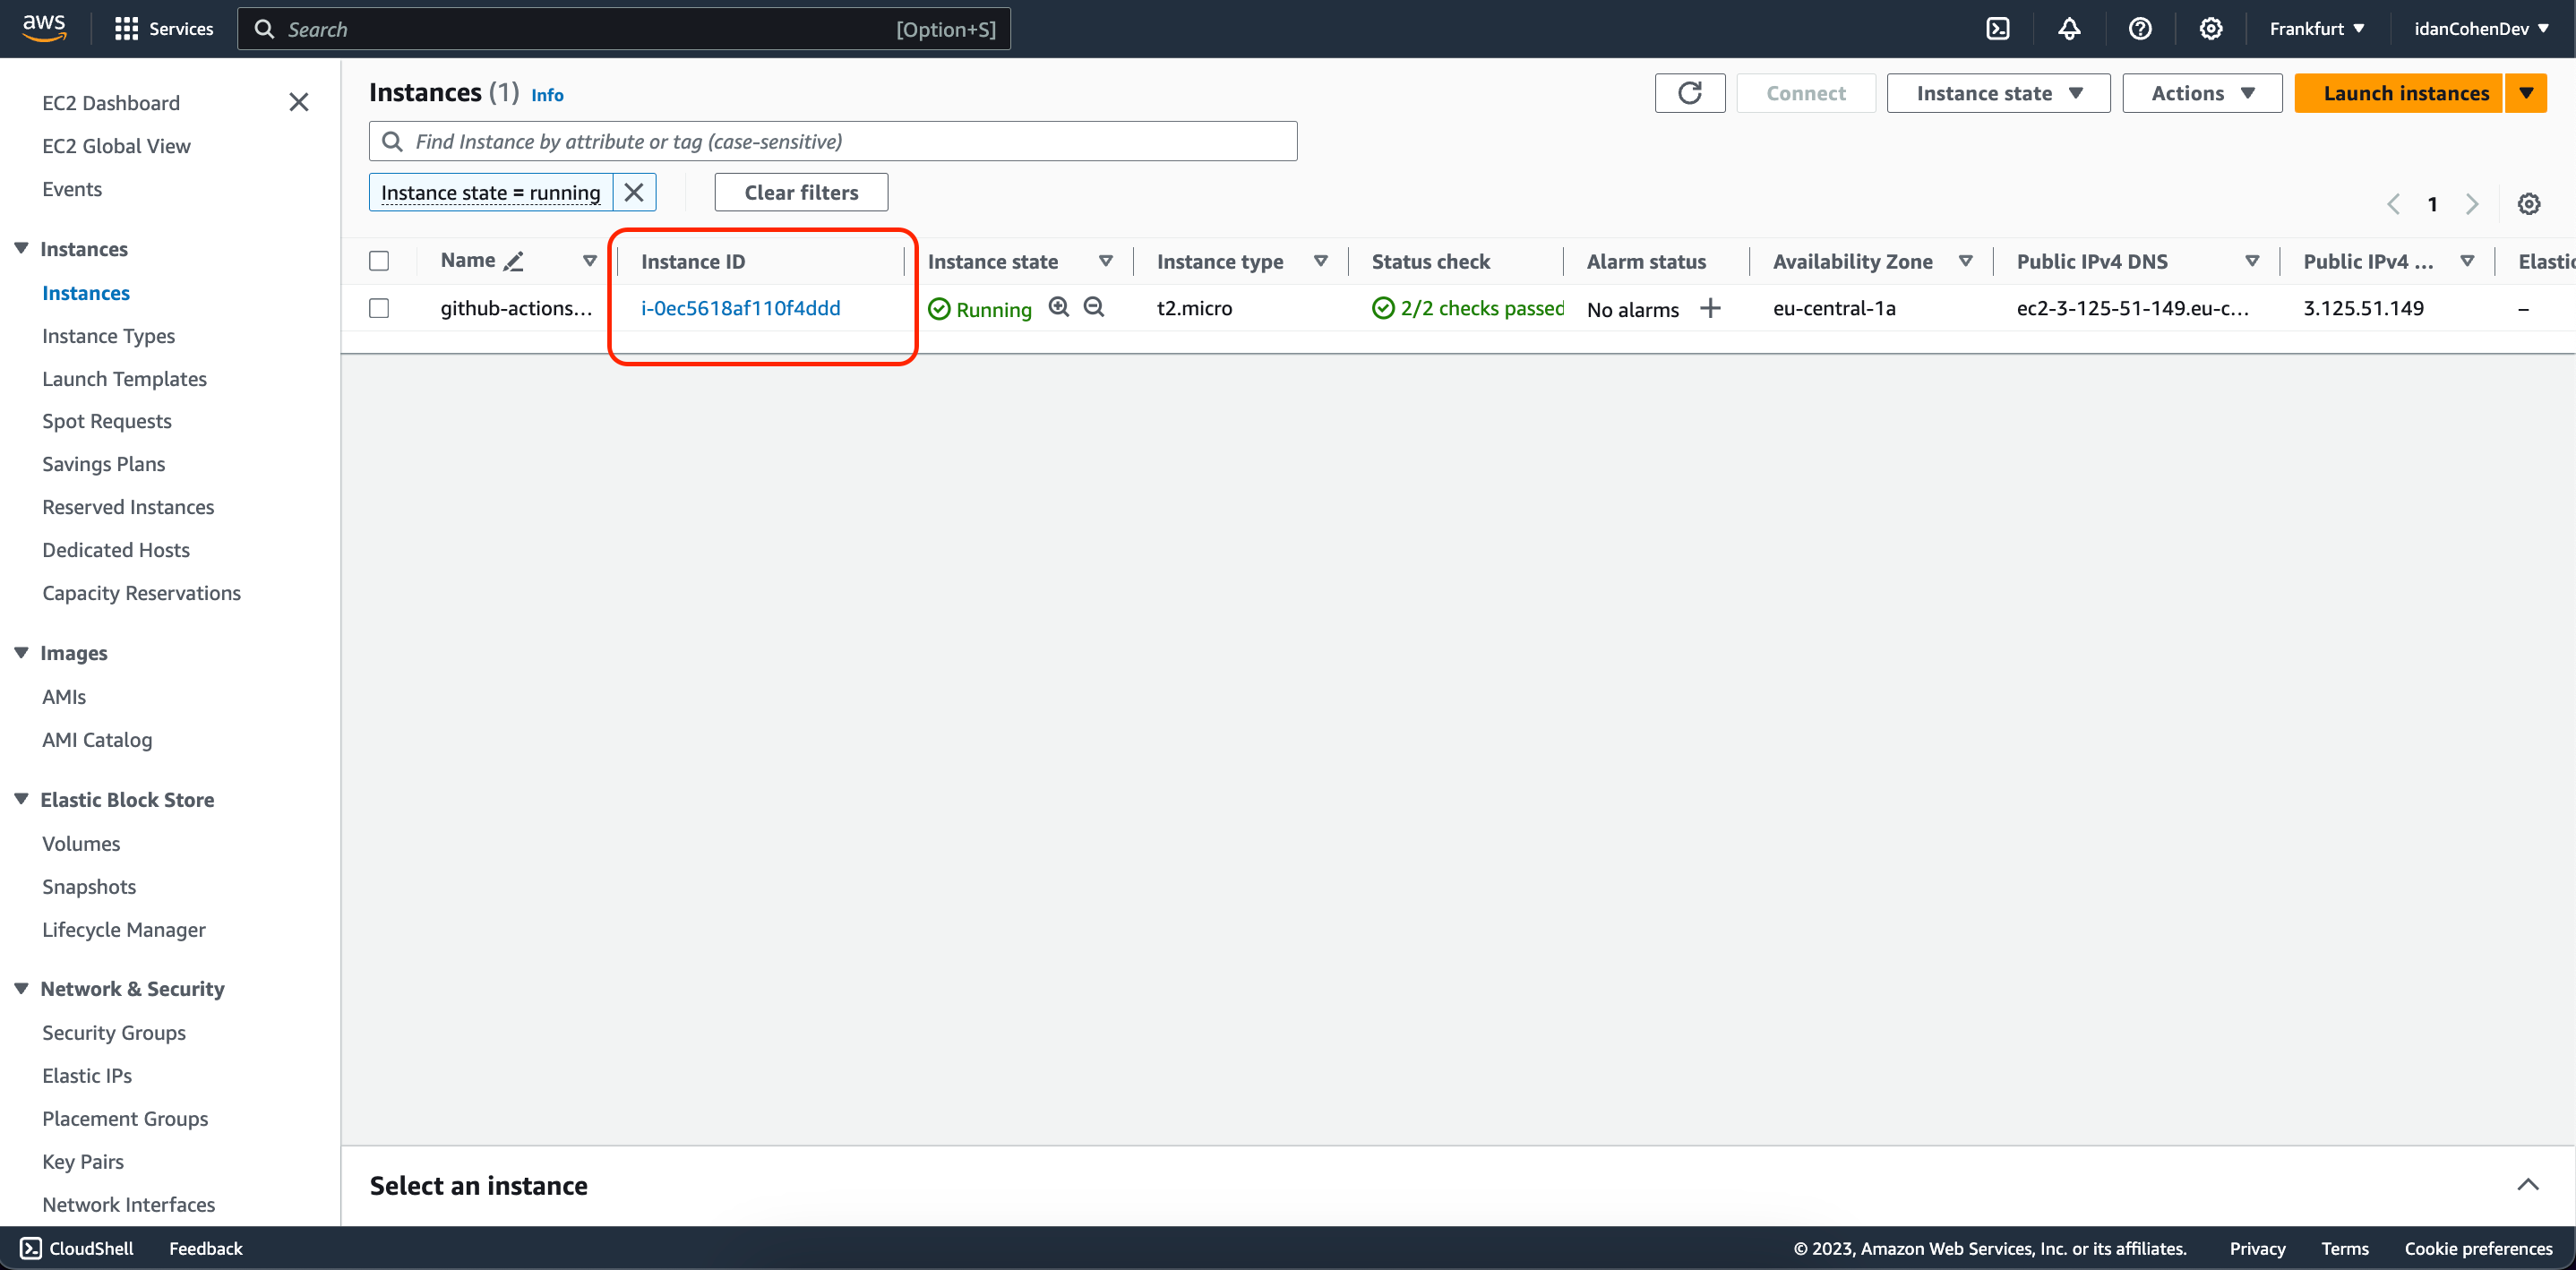
After you successfully launched the EC2 instance, Head back to your EC2 Dashboard and click on the Instances (running) link:
Click on the Instance ID of your newly running instance:
And copy the Public IPv4 address:
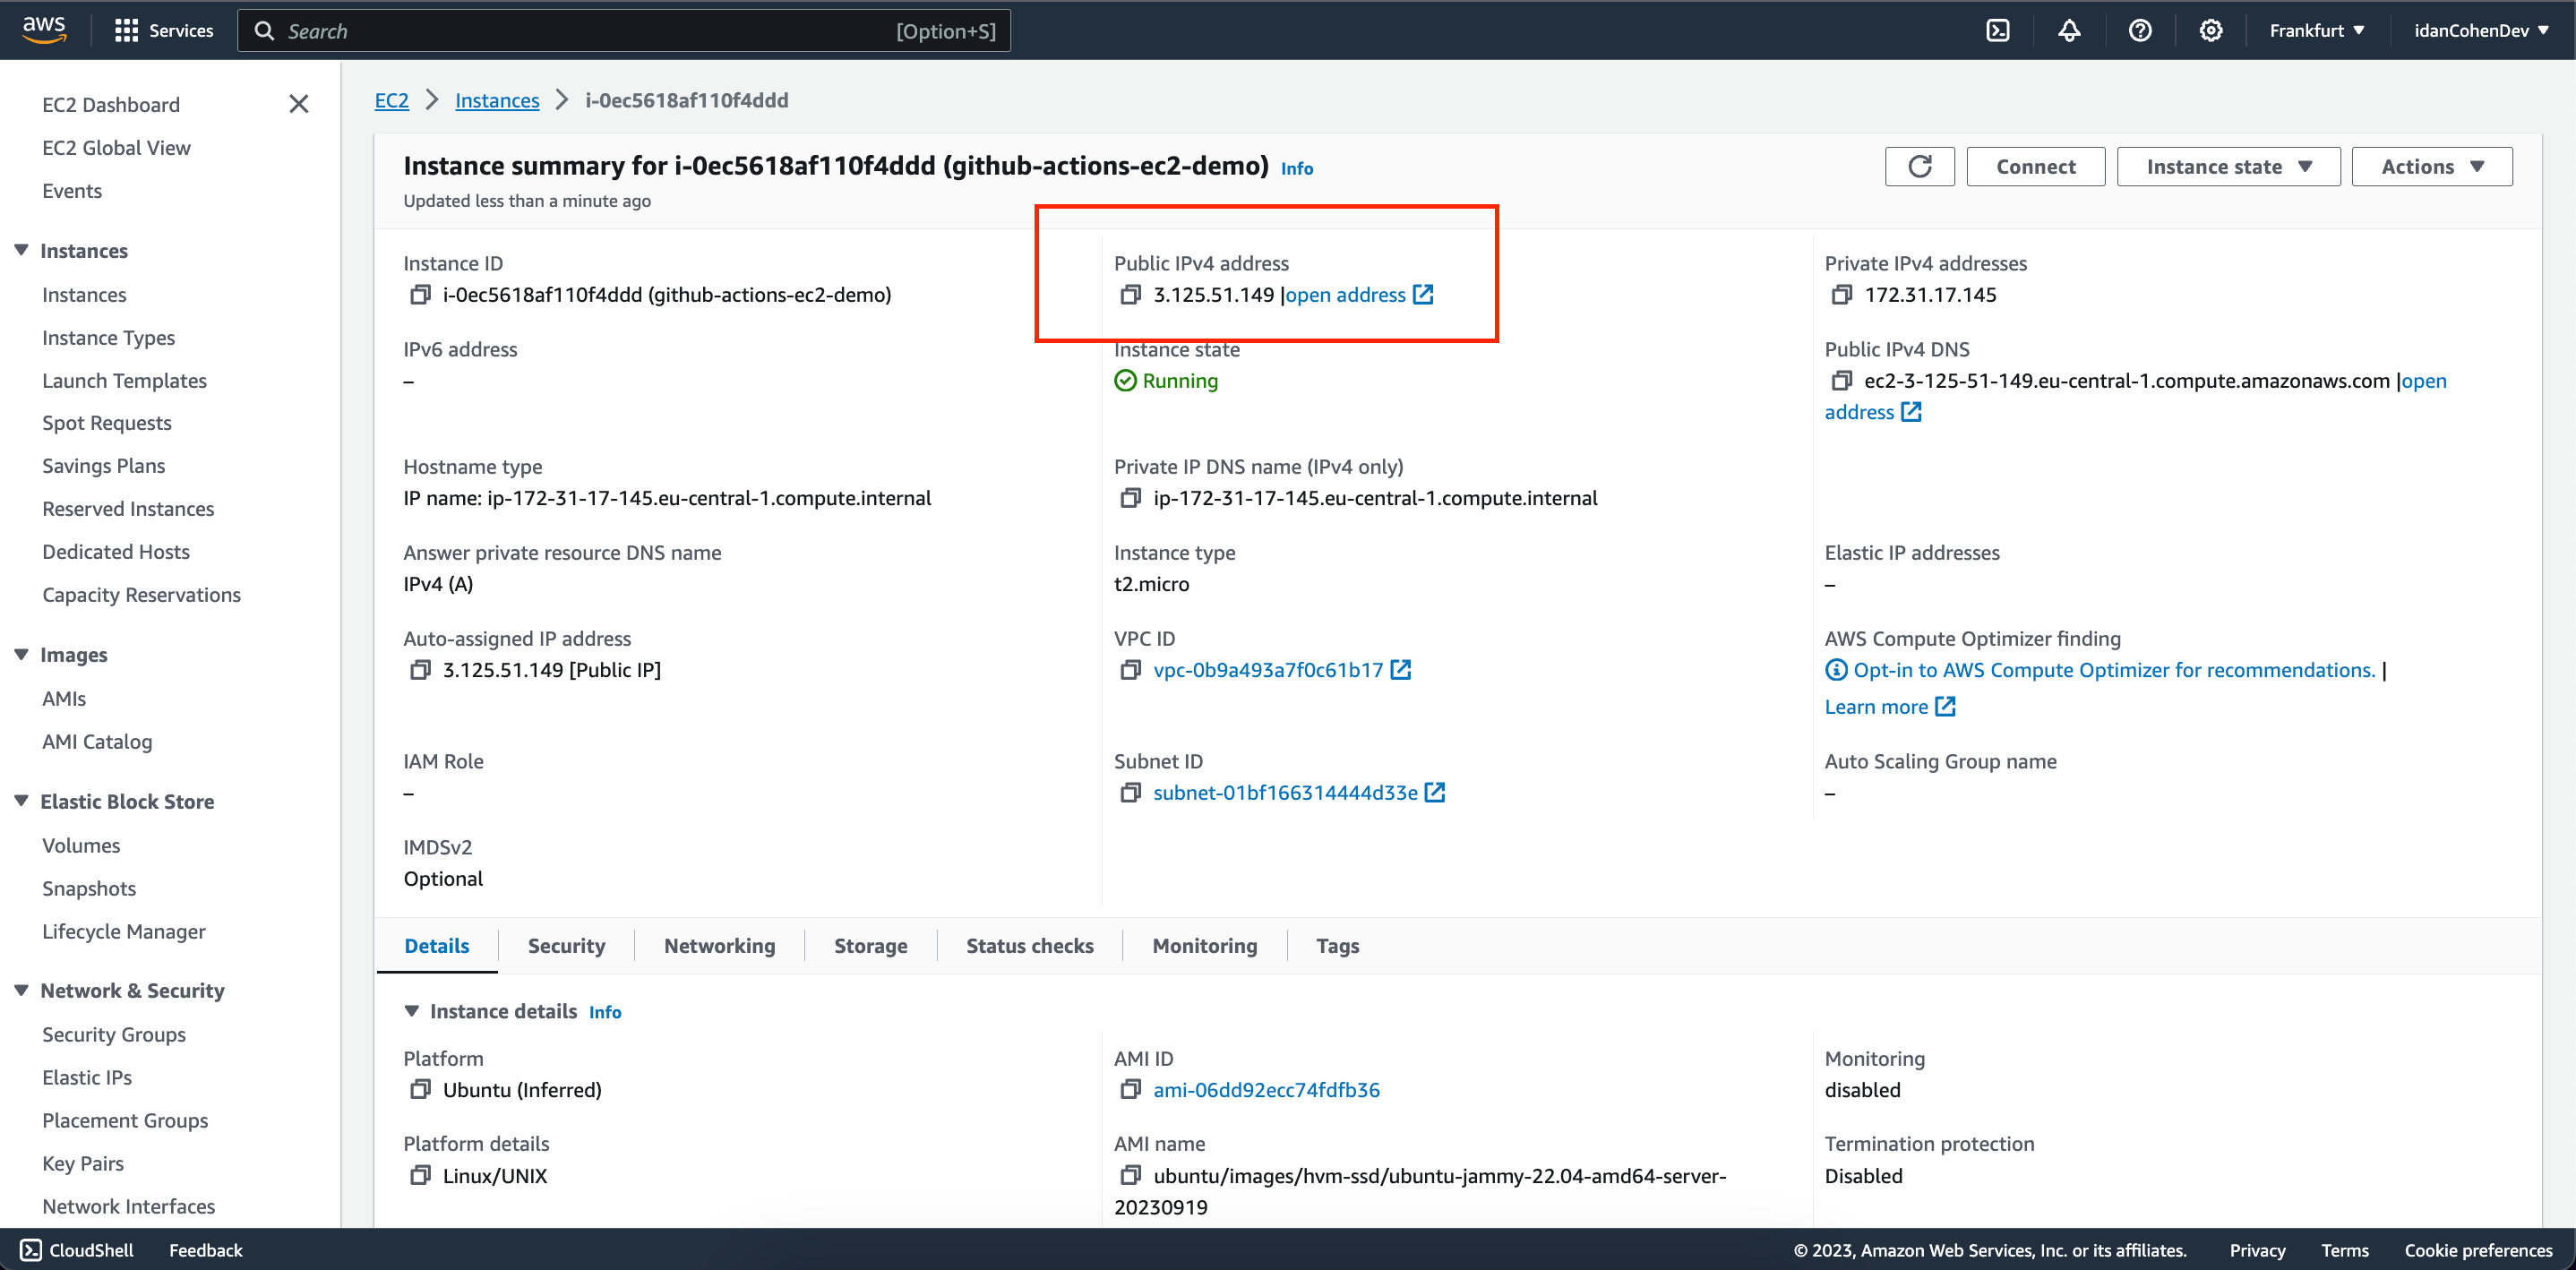
Head back to the terminal and run the following command in order to connect to your new EC2 instance:
ssh -i /PATH/TO/YOUR/PUBLIC/KEY ubuntu@<YOUR_SERVER_PUBLIC_IP>
4. Run the NodeJS application on the EC2 instance:
Connected to your EC2 instance using the terminal, run the following commands in order to install pm2, NodeJS and Git in our EC2 instance:
    sudo apt-get update #Update your system
curl -o- https://raw.githubusercontent.com/nvm-sh/nvm/v0.39.1/install.sh | bash #Install node version manager
export NVM_DIR="$([ -z "${XDG_CONFIG_HOME-}" ] && printf %s "${HOME}/.nvm" || printf %s "${XDG_CONFIG_HOME}/nvm")"
[ -s "$NVM_DIR/nvm.sh" ] && \. "$NVM_DIR/nvm.sh" #Load nvm
nvm install node #Intall the latest version of nodejs and
nvm use node #Use the installed node version
sudo npm install pm2 -g #Install pm2
sudo apt-get install git #Install git
Now clone your project from Github in your EC2 instance.
Inside your server run:
git clone https://github.com/YOUR_GITHUB_USERNAME/THE_NAME_OF_YOUR_REPOSITORY.git
Run your application on the server using pm2 (a commonly used process manager for NodeJS):
    cd <THE_NAME_OF_YOUR_REPOSITORY>
pm2 start "node index.js"
Open the logs of your pm2 process and you should see Hello World printed out:
pm2 logs
Right now we have an EC2 setup with NodeJS app running but if we change our code and push it to the master branch nothing will happen... let's fix it using Github Actions.
5.Create a Github Actions workflow:
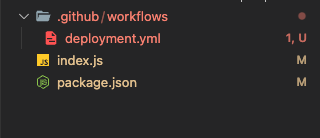
Open your project on your favorite code editor (in this tutorial i'll use VS Code) and create a folder in the root of your project called .github.
Inside the .github folder create another folder called workflows and inside the workflows folder create a file called deployment.yml (the actual name of the file doesn't matter).
Your project's folder structure should look like this in your code editor:
Inside the deployment.yml paste the following code (make sure to change <YOUR_APP_NAME> to your actual app name):
    name: CI/CD pipeline demo

on:
 push:
  branches:
   - master

jobs:
 deploy:
  runs-on: ubuntu-latest
  steps:
   - name: Deploy application
     uses: appleboy/ssh-action@master
     with:
      host: ${{ secrets.AWS_PROD_HOST }}
      username: ${{ secrets.AWS_USER }}
      key: ${{ secrets.AWS_KEY }}
      script: |
       pm2 kill
       cd /home/ubuntu/<YOUR_APP_NAME>
       git pull origin master
       pm2 start "node index.js"
This script runs when a push event is made on your git repository's master branch. It'll ssh into your server using a premade ssh action (check out the ssh action here) with your EC2 details, kill the current pm2 process, navigate to the root folder of your project, pull the new code from your master branch and restart the pm2 process (feel free to add any tasks you need when redeploying your server's code like npm install, database migrations etc.).
Now we need to provide the secretes in our Github repository in order to let the pipeline successfully ssh into our EC2 instance.
To do that we'll head to our project's Github page and click on Settings in the top navigation bar.
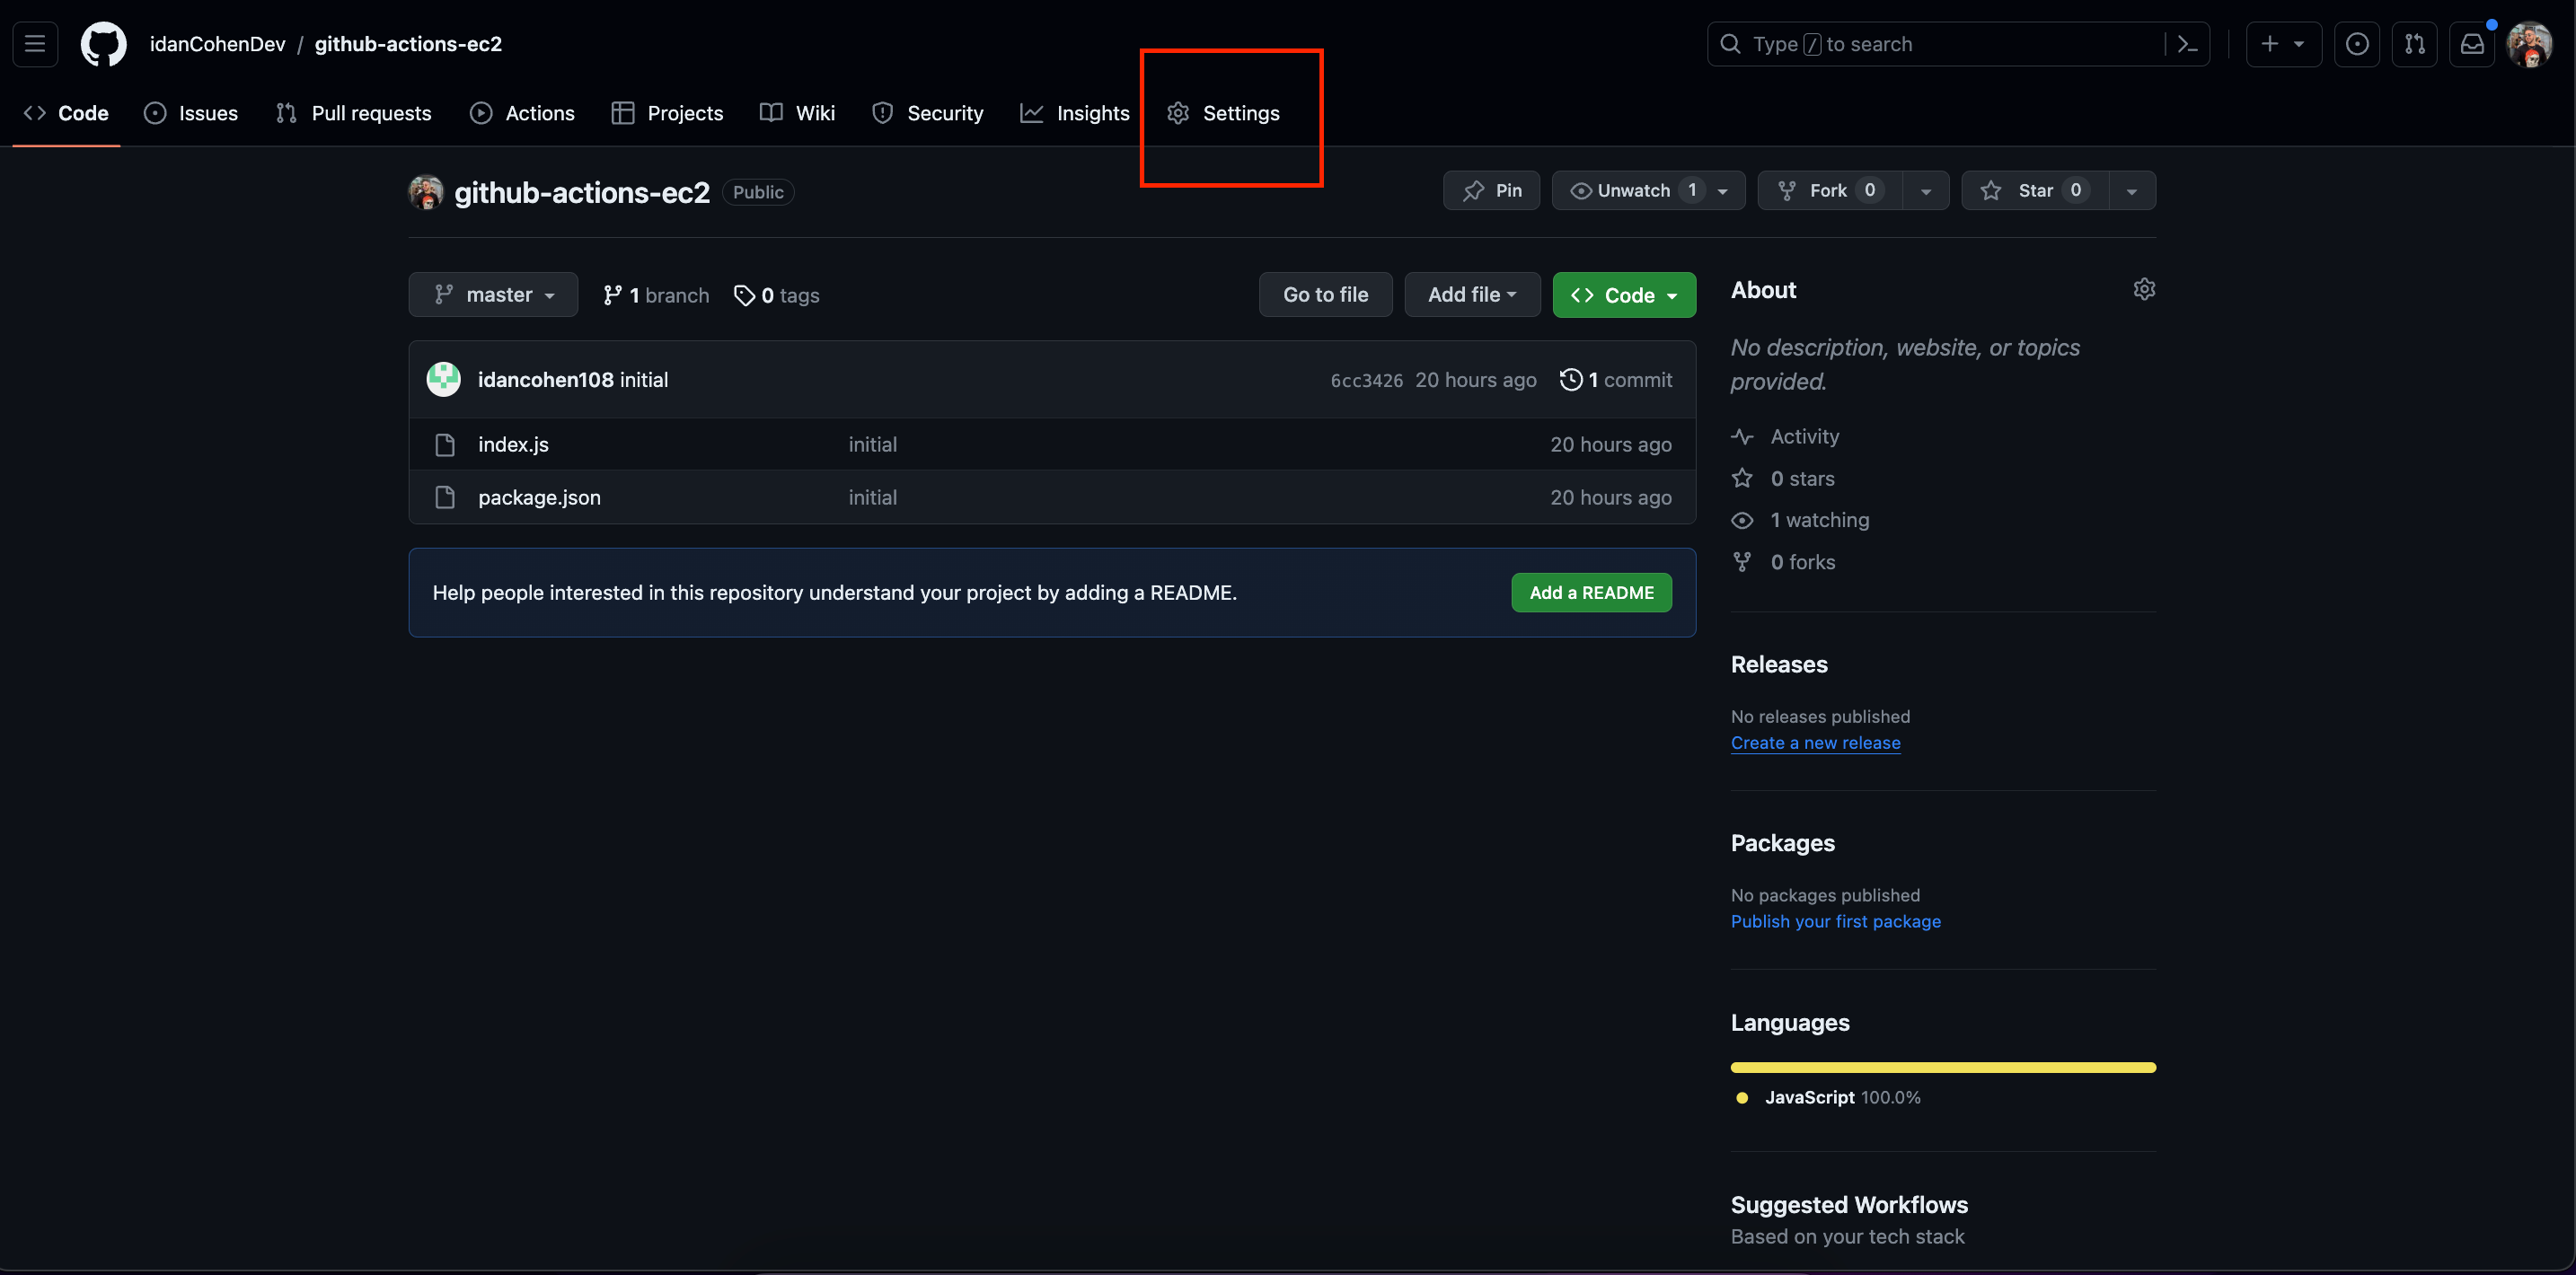
In the Settings section of our project, we'll click on the Scretes and variables button in the side menu and select the Actions tab.
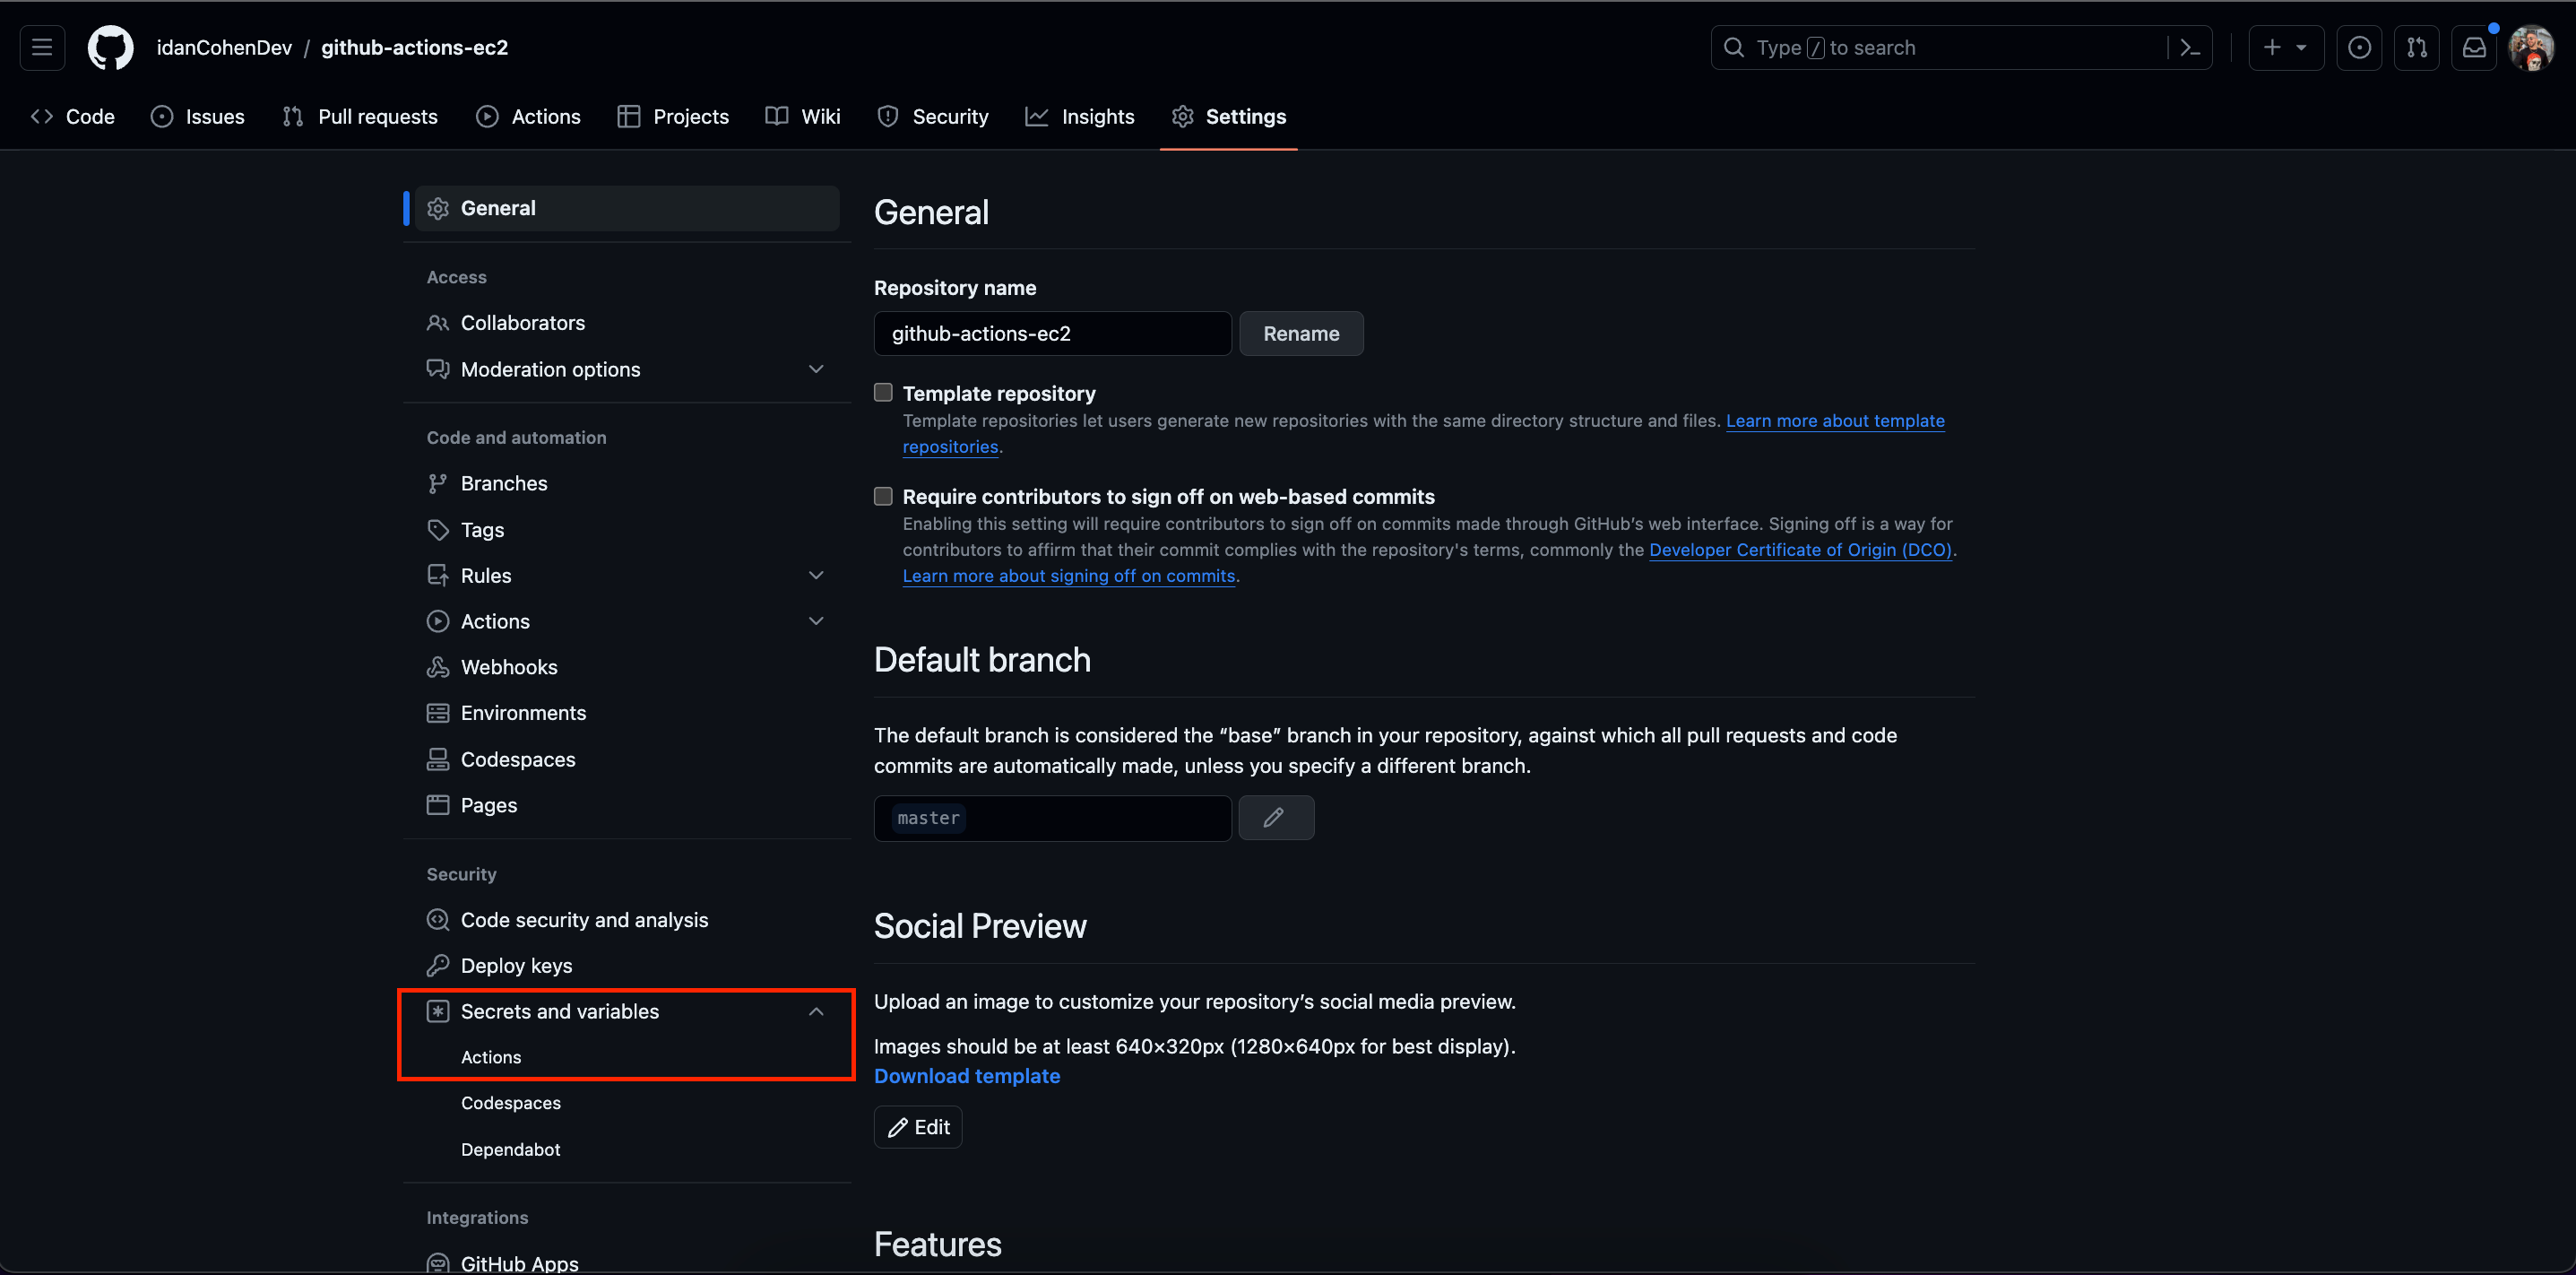
Here we'll click on the green New repository secret button and create secrets for our host, username and key.
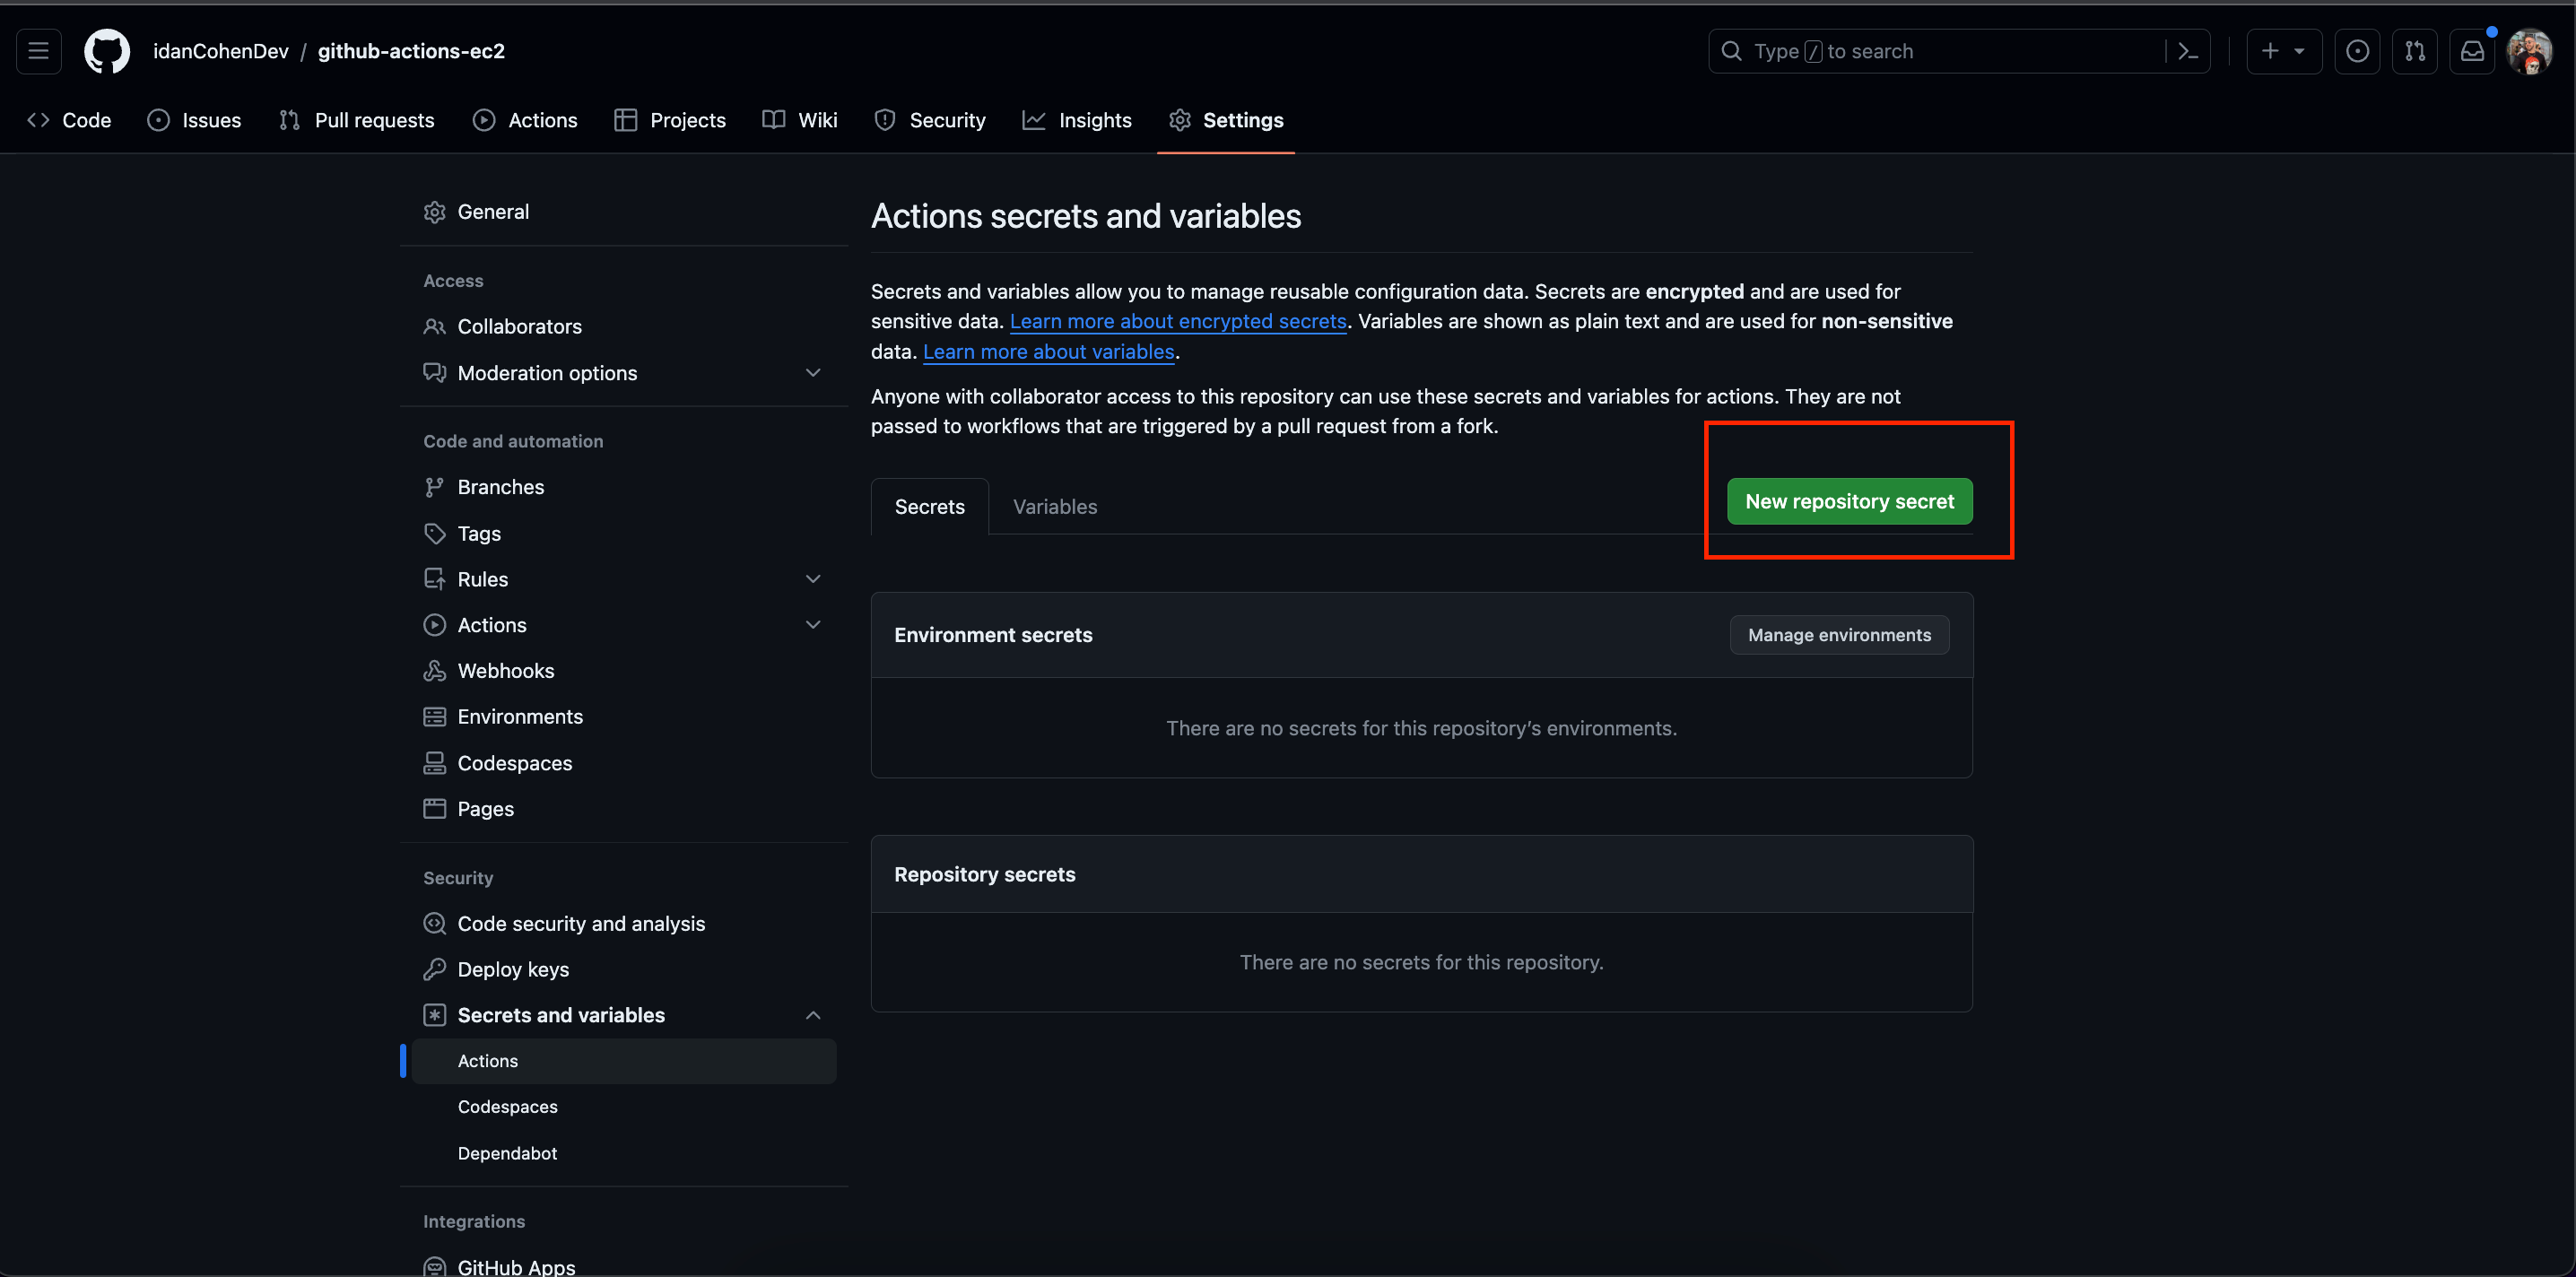
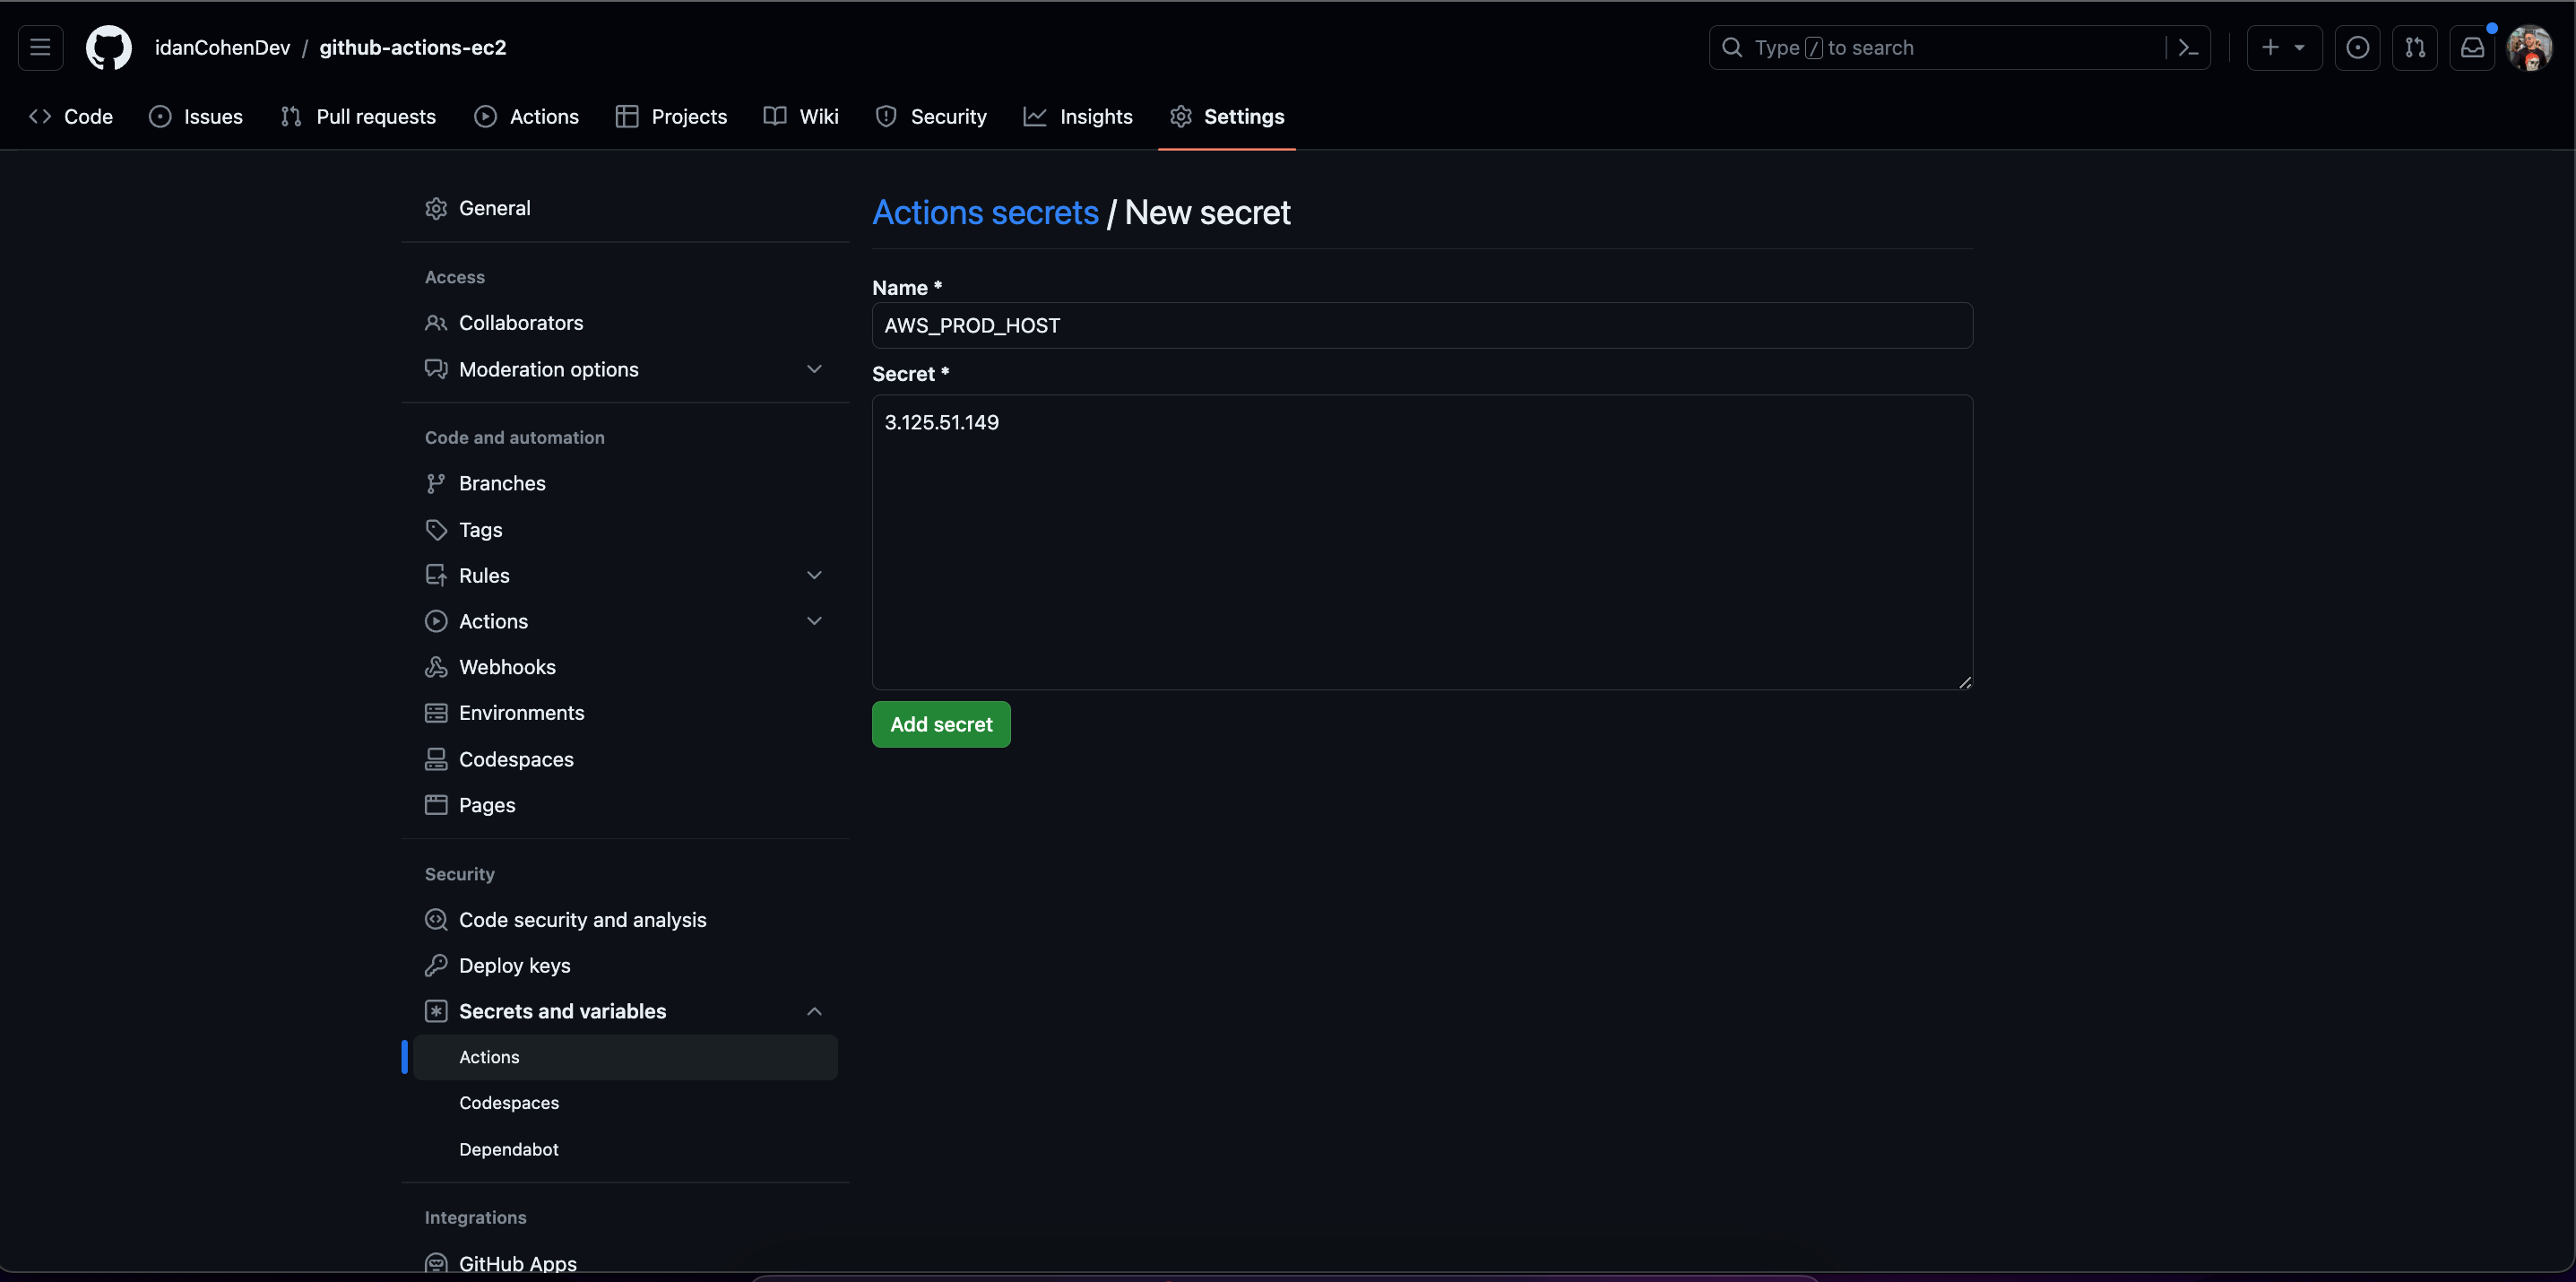
In the example above we're creating a secret for our EC2 host which is the ip address of our remote server.
Repeat the process for your EC2 username (in our case it's usually ubuntu) and for the key you've created when launching your EC2 instance (the content of the key used to ssh into the server).
When we are done with setting up the secrets we can navigate to our project in our local machine, change the content of your index.js file and push the code to Github using:
    git add .
git commit -m "A commit message"
git push origin master
Connect back to your remote server, run pm2 logs one again and you should see the changes reflected on your server.
Found any errors? something's not clear? let me know!
Contact me on Linkedin, Github or email me.